In this article we are going to cover What is SonarScanner? , Features of SonarScanner CLI, How to run SonarScanner CLI from the zip file?
What is SonarScanner CLI?
SonarScanner CLI (Command Line Interface) is a standalone tool that allows developers to analyze and audit the quality of their source code using SonarQube or SonarCloud. SonarQube is an open-source platform for continuous inspection of code quality, and SonarCloud is its cloud-based counterpart.
The SonarScanner CLI is used to scan projects in various programming languages and integrates with the SonarQube server to provide detailed reports on code quality issues such as bugs, vulnerabilities, code smells, and test coverage.
Key features of the SonarScanner CLI include:
- Multi-Language Support: It supports a wide range of programming languages, making it suitable for diverse projects.
- Flexibility: It can be used on the command line, making it easy to integrate with CI/CD systems like Jenkins, Travis CI, GitLab CI, etc.
- Configuration: It can be configured through a
sonar-project.propertiesfile or command line arguments to define things like project keys, server URL, source directories, etc. - Integration with Version Control Systems: It can integrate with popular VCS like Git, SVN, Mercurial, etc., to provide blame information and historical analysis.
To use SonarScanner CLI, you typically need to:
- Install SonarScanner CLI on the machine where the analysis will be run.
- Configure the
sonar-project.propertiesfile or equivalent command line parameters with the proper settings for your project. - Run the SonarScanner to analyze your project.
- Review the results on the SonarQube server or SonarCloud dashboard.
How to Run SonarScanner CLI from the zip file?
To run SonarScanner CLI from the zip file, you’ll need to follow these steps:
Step #1:Download SonarScanner CLI Zip file:
Go to the official SonarScanner page and download the SonarScanner CLI zip file suitable for your operating system.

Step #2:Extract the Zip file:
Extract the contents of the downloaded zip file to a location on your computer.

Step #3:Set Up Environment Variables:
Sometimes, setting up environment variables might be necessary for the SonarScanner CLI to be recognized system-wide. The instructions for setting up environment variables can differ based on the operating system you are using. So here we are used Windows OS.
- Right-click on “This PC” or “My Computer,” select “Properties.”
- Go to “Advanced system settings” > “Environment Variables.”
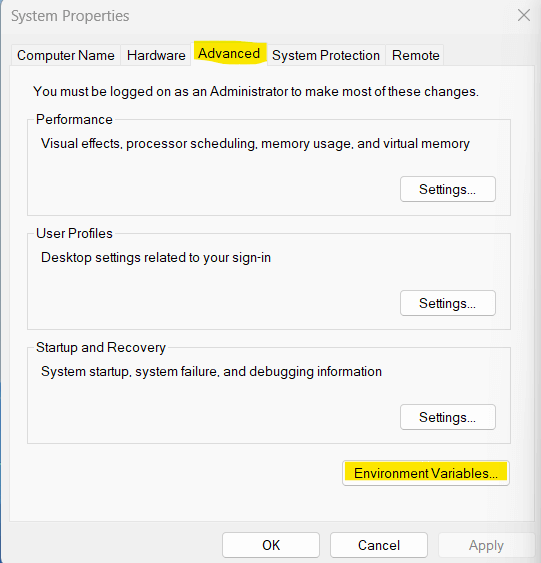
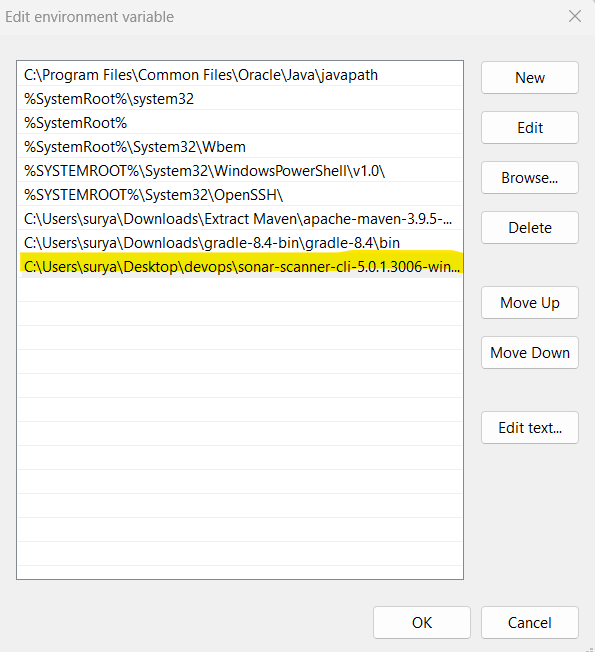
- Under “System variables,” select “Path” and click “Edit.”
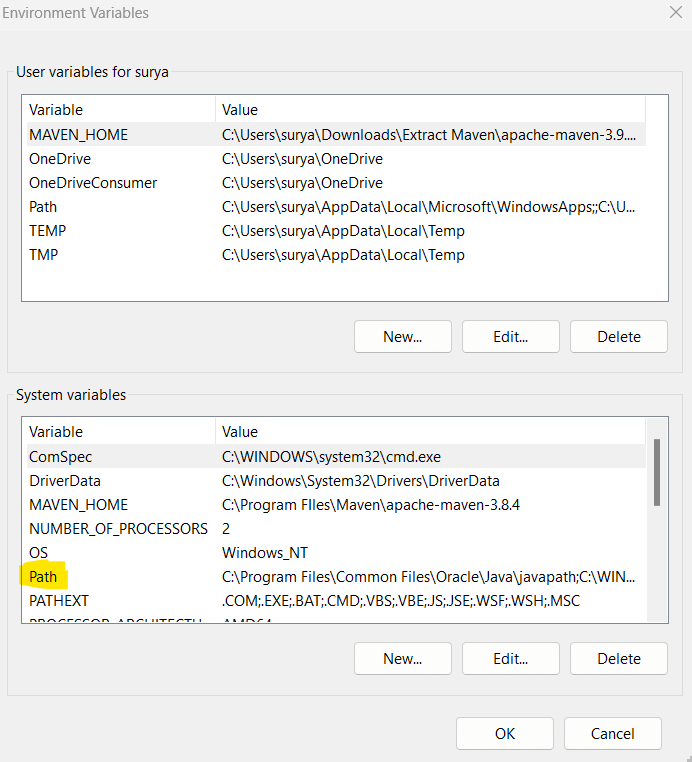
Add the path to the folder containing the SonarScanner CLI executable (e.g., C:\sonar-scanner\bin) to the list of paths if not already added.
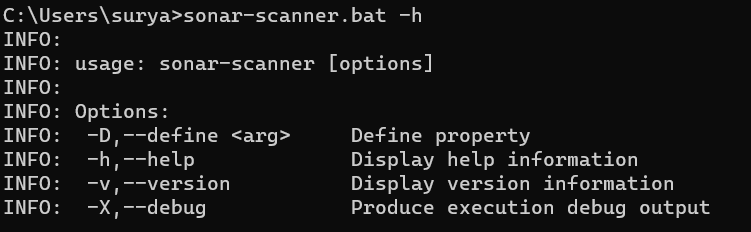
Step #4:Verify SonarScanner Installation:
Open a new terminal or command prompt and run the below command:
sonar-scanner.bat -h
You should see the help information for the SonarScanner CLI if the installation was successful.
Output:
Step #5:Configure SonarQube Properties (if necessary):
Create a sonar-project.properties file in the root directory of your project to configure properties such as the SonarQube server URL, project key, login, password, authentication tokens, etc. This file should contain the necessary project configuration details required by SonarQube.
#----- Default SonarQube server
sonar.host.url=http://localhost:9000
sonar.login=admin
sonar.password=admin@123
# must be unique in a given SonarQube instance
sonar.projectKey=my:project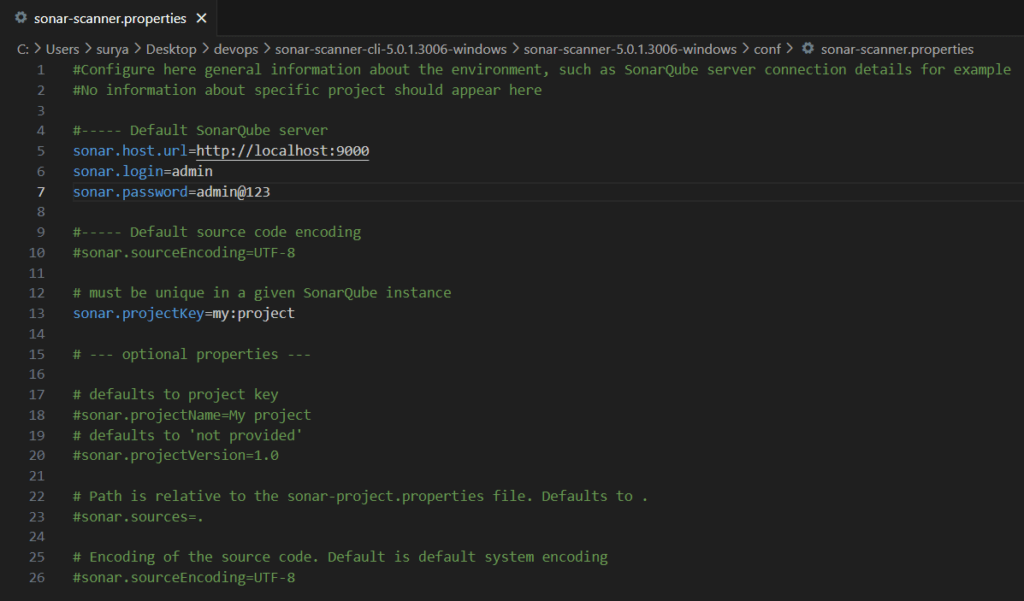
Step #6:Run SonarScanner Analysis:
Navigate to the base directory of your project using the command prompt or terminal and execute the following command to start the analysis:
sonar-scanner


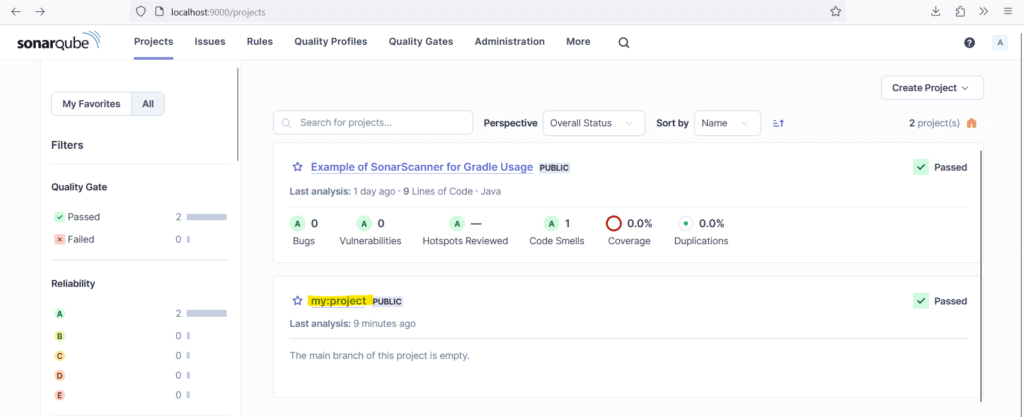
Step #7:View Results on SonarQube
Once the analysis completes, you can log in to your SonarQube server or SonarCloud account to view the analysis results, code quality metrics, issues, etc.
Conclusion:
In this article we have covered What is SonarScanner? , Features of SonarScanner CLI, How to run SonarScanner CLI from the zip file?
Related Articles:
Good Job. Well done. It worked for me.