An Elastic Load Balancer in AWS is like a traffic cop for your web applications. Imagine you have a bunch of servers (called instances) that host your website or application. When users try to access your site, the load balancer helps distribute the incoming traffic across these servers to ensure they don’t get overwhelmed and can handle the requests efficiently.
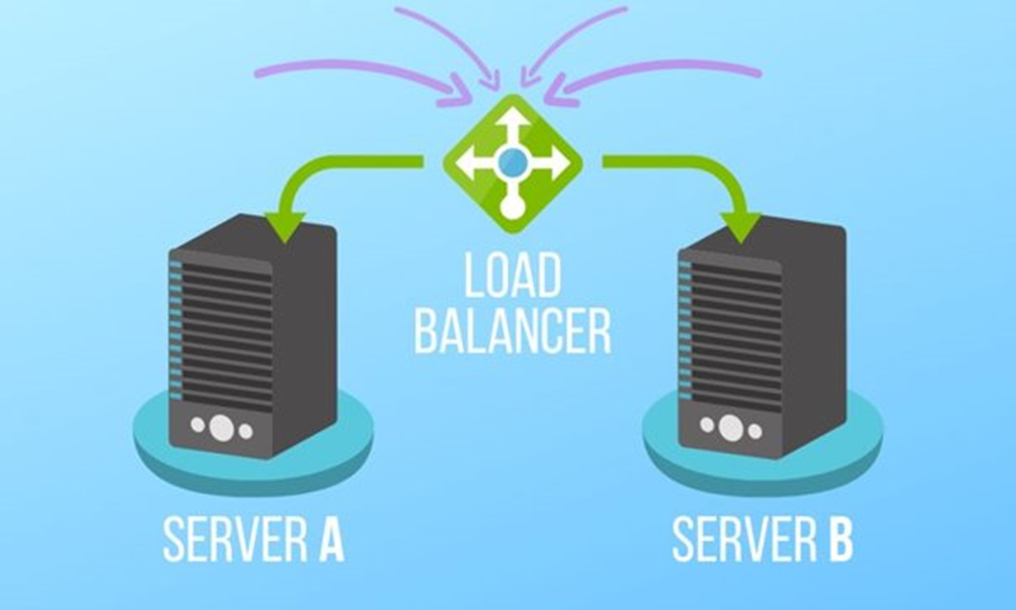
Table of Contents
Workflow of load balancer:
Here’s a breakdown of how it works:
- Traffic Distribution: The load balancer evenly distributes incoming requests among the servers. This ensures that no single server bears too much load, preventing performance issues.
- High Availability: If one server goes down, the load balancer automatically redirects traffic to the healthy servers. This helps in making your application more reliable and available.
- Health Checks: The load balancer periodically checks the health of each server by sending small requests. If a server doesn’t respond or is unhealthy, the load balancer stops sending traffic to it until it recovers.
- Scalability: As your application grows, you can easily add more servers. The load balancer will adapt to the changes and continue distributing traffic evenly, allowing your system to scale seamlessly.
Types of Elastic Load Balancer in AWS
1.Application Load Balancer (ALB):
Layer: Operates at Layer 7 (Application layer) of the OSI model.
Features:
Content-Based Routing: ALB can route traffic based on content, such as URL paths or hostnames, allowing for more flexible and fine-grained routing decisions.
SSL Termination: Supports SSL/TLS termination, relieving backend servers from the burden of handling encryption and decryption.
WebSocket Support: ALB is capable of handling WebSocket traffic, making it suitable for real-time applications.
Containerized Application Support: Well-suited for applications deployed using container services like Amazon ECS or Kubernetes.
Creating AWS Application load balancer :
Creating an AWS Application Load Balancer (ALB) involves several steps, including setting up EC2 instances, creating a target group, configuring a web server, and finally creating the ALB itself. Below is a step-by-step tutorial for creating an AWS ALB with EC2 instances running Windows and a target group.
Step 1: Launch EC2 Instances (Windows)
1.Sign in to the AWS Management Console and Navigate to the EC2 Dashboard.
- Launch an EC2 Instance:
- Click on “Launch Instance.”
- Choose a Windows AMI (Amazon Machine Image).
2.Configure Instance:
- Choose an instance type and configure other details as needed.
- Create or select a security group allowing inbound traffic on port 80 (HTTP) for your web server.
3.Add Storage and Tags:
- Configure storage as per your requirements.
- Add any tags if needed.
4.Configure Security Group:
- Configure the security group to allow inbound traffic on port 80 (HTTP).
5.Review and Launch:
- Review your configuration and launch the instance.
- Create or select an existing key pair to access the instance securely.
Step 2: Set Up a Simple Web Server on the EC2 Instance (Windows)
1.Connect to the EC2 Instance:
- Use Remote Desktop Protocol (RDP) to connect to your Windows instance.
2.Install Web Server (IIS):
- Open PowerShell or Command Prompt with Administrator privileges.
- Install IIS with the command:
Install-WindowsFeature -Name Web-Server -IncludeManagementTools
3.Create a Sample Web Page:
- Create an HTML file (e.g., index.html) in the default web root folder (C:\inetpub\wwwroot).
4.Test the Web Server:
- Open a web browser and navigate to the public IP address of your EC2 instance to ensure the web server is accessible.
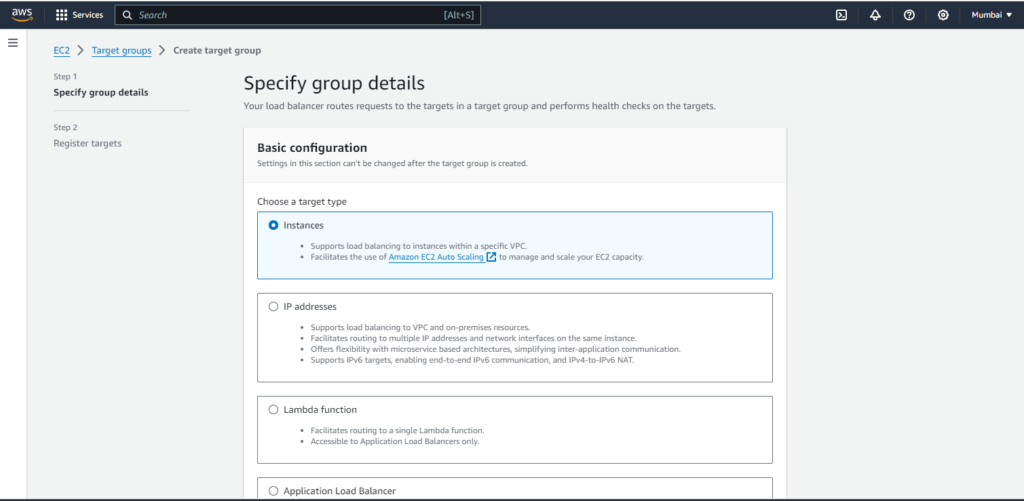
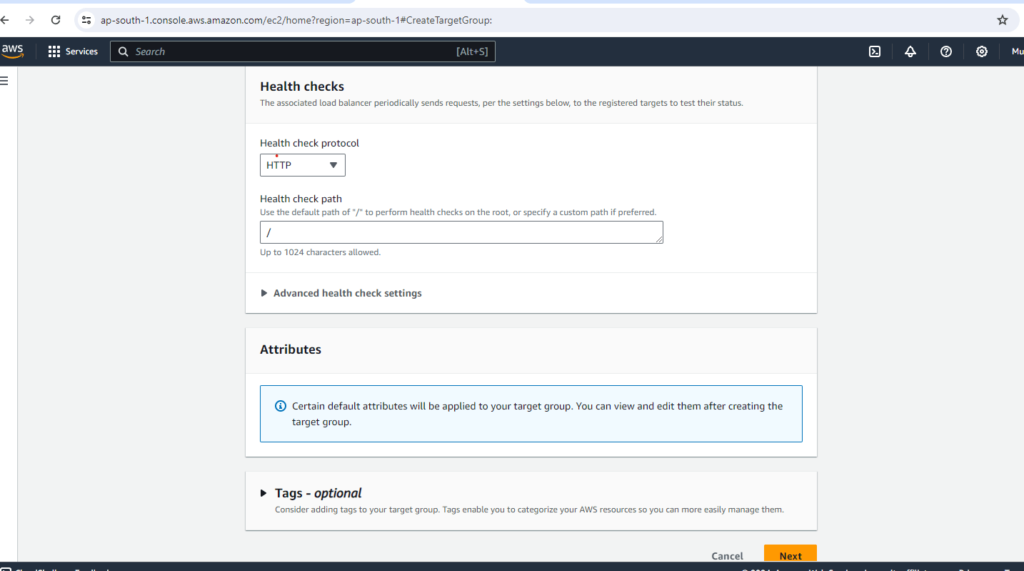
Step 3: Create a Target Group:
1.Navigate to the Target Groups in AWS Console:
- In the EC2 Dashboard, under “Load Balancing,” click on “Target Groups.”
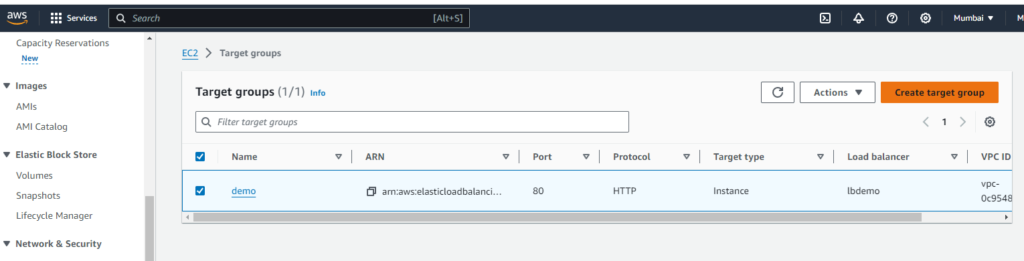
2.Create a New Target Group:
- Click on “Create Target Group.”
- Configure the target group settings, ensuring the protocol matches your web server (e.g., HTTP on port 80).
- Register the EC2 instance created earlier with the target group.

Step 4: Create an Application Load Balancer (ALB):
1.Navigate to the Load Balancers in AWS Console:
- In the EC2 Dashboard, under “Load Balancing,” click on “Load Balancers.”
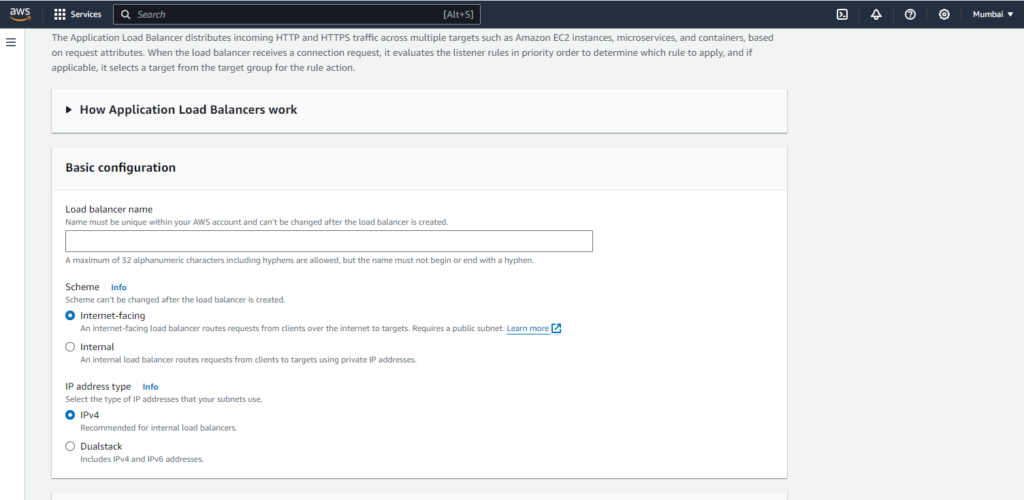
2.Create a New Load Balancer:
- Click on “Create Load Balancer.”
- Choose “Application Load Balancer.”

3.Configure Load Balancer Settings:
- Specify the name and select the appropriate VPC.
4.Configure Security Settings:
- Choose an existing or create a new security group allowing inbound traffic on ports 80 and 443.

5.Configure Routing:
- Create a new listener on port 80 (HTTP).
- Choose the target group created earlier.
6.Configure Health Checks:
- Set up health checks based on your application requirements.
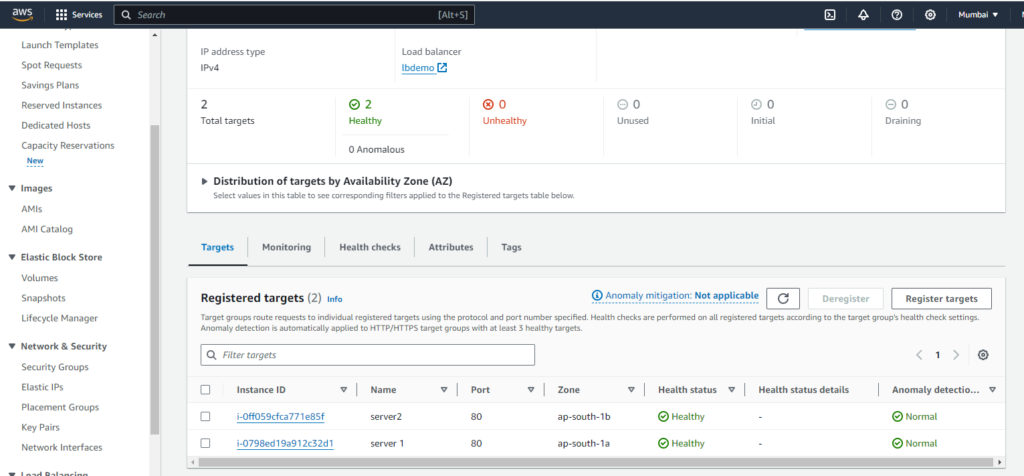
7.Add EC2 Instances to Target Group:
- Register the EC2 instances with the ALB.
8.Review and Create:
- Review your settings and click on “Create.”
Step 5: Test the Application Load Balancer:
1.Retrieve ALB DNS Name:
- Once the ALB is created, obtain its DNS name from the AWS Console.

2.Access the Web Application:
- Open a web browser and navigate to the ALB DNS name.
- Ensure the application is accessible through the ALB.

Congratulations! You’ve now set up an AWS Application Load Balancer with EC2 instances running Windows and a basic web server. Make sure to customize the setup based on your specific application requirements and security considerations.
2.Network Load Balancer (NLB):
Layer: Operates at Layer 4 (Transport layer) of the OSI model.
Features:
High Performance: NLB is designed for high-throughput, low-latency scenarios and is capable of handling millions of requests per second.
TCP/UDP Load Balancing: NLB is ideal for applications that rely on TCP, UDP, or TLS traffic.
Static IP Support: NLB provides static IP addresses, which can be beneficial for scenarios where IP address stability is crucial.
3.Classic Load Balancer:
Layer: Initially designed to be flexible but is considered a legacy option.
Features:
Basic Load Balancing: Classic Load Balancers are suitable for distributing incoming HTTP/HTTPS traffic across multiple EC2 instances.
Sticky Sessions: Supports session stickiness, allowing the load balancer to bind a user’s session to a specific instance.
4.Gateway Load Balancer (GLB):
Layer: Operates at Layer 3 (Network layer) of the OSI model.
Features:
Distributed Load Balancing: GLB is designed for handling network-level traffic and can distribute traffic across multiple Virtual Private Clouds (VPCs) or across on-premises and AWS environments.
Global Accelerator Integration: GLB is often used in conjunction with AWS Global Accelerator to provide a highly available and scalable global application delivery solution.
Related Articles:
Deploy Application to AWS Elastic Beanstalk
Reference: