In this article we are going to cover SonarQube Integration with Jenkins Pipeline, Install SonarQube Scanner Plugin in Jenkins, Configure SonarQube servers in Jenkins, Create a Jenkins Pipeline, Write the Jenkinsfile in your repository to integrate SonarQube with Jenkins pipeline.
Table of Contents
What is SonarQube?
SonarQube is an open-source platform for continuous code quality inspection. It analyzes source code, detects bugs, security vulnerabilities, and code smells, helping developers maintain high-quality, secure, and maintainable software. It integrates into the development workflow, allowing teams to catch issues early and ensure better overall software quality.
What is purpose of SonarQube Integration with Jenkins Pipeline?
The purpose of SonarQube integration with Jenkins Pipeline is to automate continuous code quality and security checks. It ensures that every code change is analyzed for issues, such as bugs and security vulnerabilities, as part of the CI/CD process. This integration provides early feedback to developers, enforces coding standards, and improves overall software quality and security.
Integrating SonarQube with Jenkins allows you to automate the process of running static code analysis on your projects.
Here’s a step-by-step guide to integrating SonarQube with Jenkins:
Prerequisites:
- Jenkins: Make sure Jenkins is installed and running.
- SonarQube: Have a SonarQube server up and running. You can download it from the official website and follow the installation instructions.
Steps to SonarQube Integration with Jenkins Pipeline
Step #1:Install SonarQube Scanner Plugin in Jenkins
In Jenkins, you need to install the necessary plugins:
- SonarQube Scanner Plugin: This plugin integrates Jenkins with SonarQube. Install it from the Jenkins Plugin Manager.

Step #2:Configure SonarQube server in Jenkins
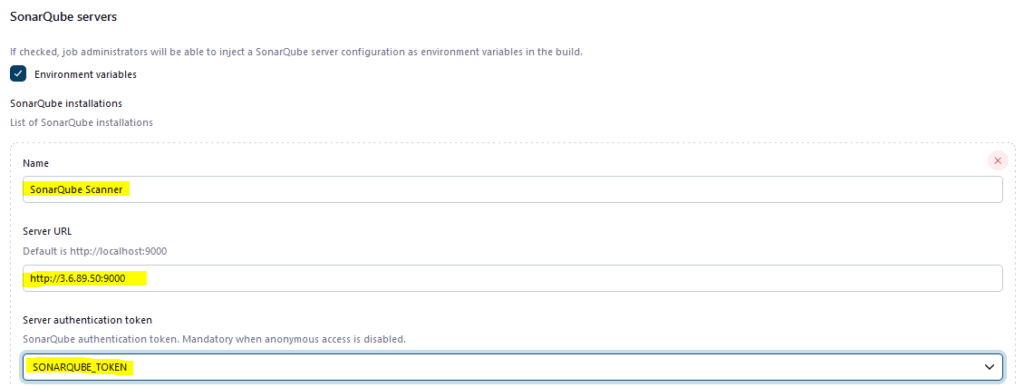
- Go to Jenkins > Manage Jenkins > Configure System.
- Scroll down to the SonarQube servers section and click Add SonarQube.

- Enter a name for the SonarQube server configuration.
- Provide the Server URL where your SonarQube server is running.
- Add the Server Authentication Token. Click on add.
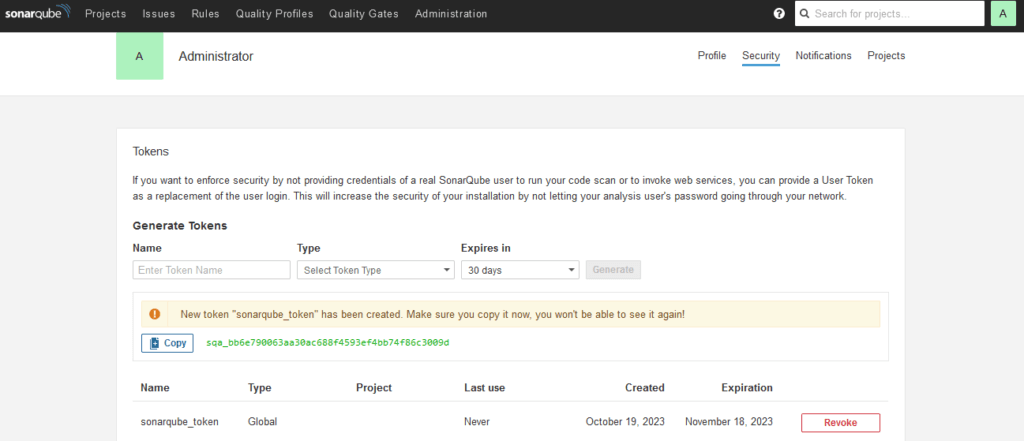
You can generate this token in your SonarQube server under My Account > Security > Token generate token and copy it in another text file for further use like in Jenkins.
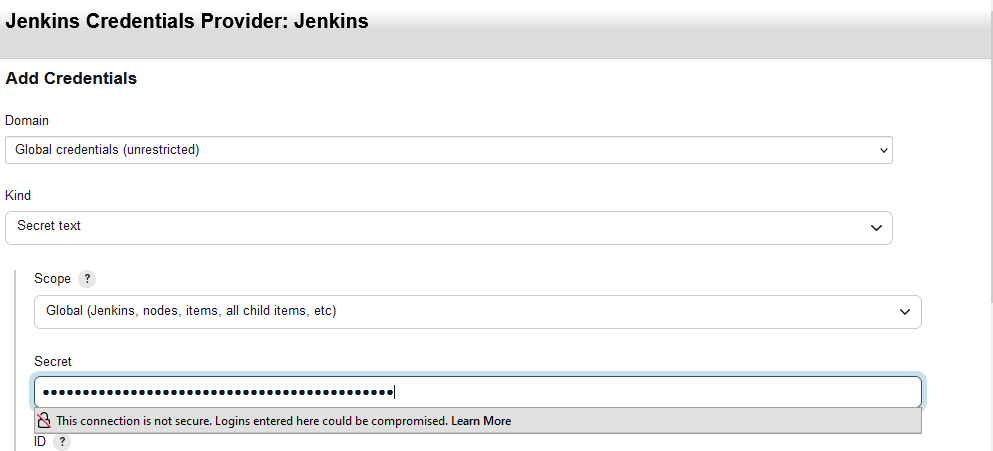
After that paste token in secret text box and mention ID for used token name.
Step #3:Create a Jenkins Pipeline to Integrate SonarQube
Create a New Pipeline Job in Jenkins:
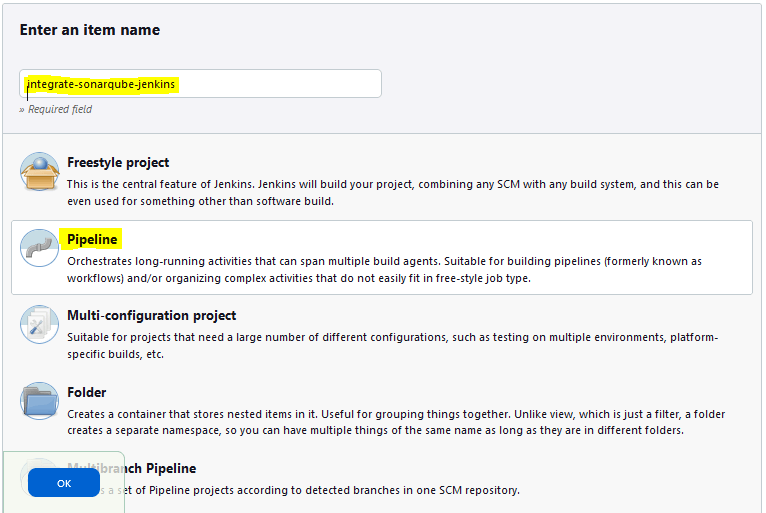
Click on “New Item” in the Jenkins dashboard.
Choose “Pipeline” and enter a name for your job.
Click “OK” to create the job.
- Configure Pipeline Script in Jenkins:
In the job configuration, scroll down to the “Pipeline” section.
Choose “Pipeline script from SCM” as the Definition.
Select your version control system (Git, SVN, etc.).
Provide the Repository URL and credentials if necessary.
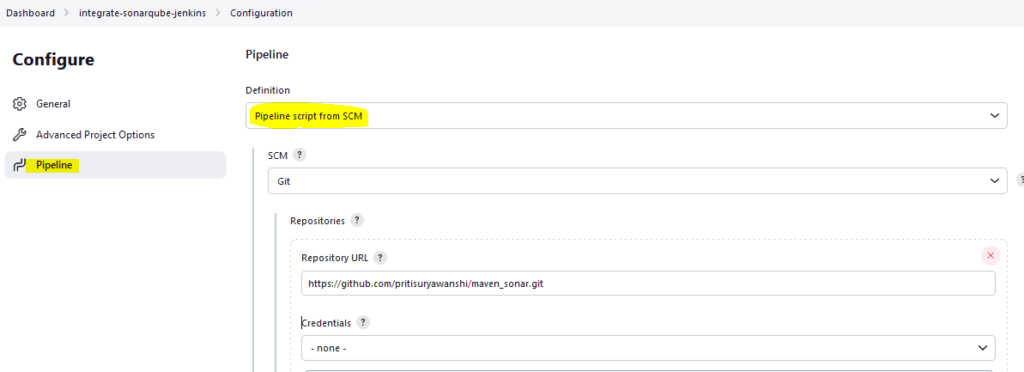
Specify the path to your Jenkinsfile if it’s not in the repository root.
Step #4:Write the Jenkinsfile in your repository to integrate SonarQube with Jenkins pipeline
Create a Jenkinsfile in your repository with the following content:
pipeline {
        agent none
        stages {

          stage("build & SonarQube Scanner") {
            agent any
            steps {
              withSonarQubeEnv('SonarQube Scanner') {
                sh 'mvn clean package sonar:sonar'
              }
            }
          }
        }
      }
It consists of Stage “build & SonarQube Scanner“:
- This stage runs on any available agent (agent any), which means Jenkins will allocate an executor to execute these steps.
- Within this stage, you configure the SonarQube environment with withSonarQubeEnv.
- The sh command is used to execute the Maven build and SonarQube analysis. The provided command runs a clean build (mvn clean) followed by packaging the application and running the SonarQube analysis (mvn package sonar:sonar).
Make sure to configure your Jenkins job to use this pipeline script. Additionally, ensure that the SonarQube Scanner tool is correctly set up in your Jenkins Global Tool Configuration, and the SonarQube server’s configuration is correct.
Step #5:Run the Jenkins Pipeline
Save your Jenkinsfile, commit it to your version control system, and then trigger the Jenkins job. The pipeline will automatically fetch your code, build it, analyze it using SonarQube, and enforce quality gates.
You can see Console output:
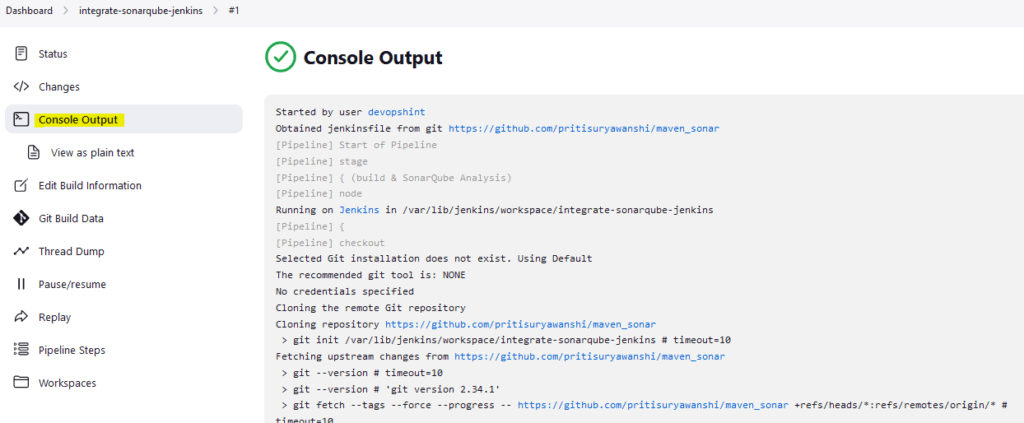

After that build success you can Analysis your project on SonarQube server as shown below.

This integration ensures that your code quality is continuously monitored as part of your CI/CD pipeline
Conclusion:
In this article we have covered SonarQube Integration with Jenkins Pipeline, Install SonarQube Scanner Plugin in Jenkins, Configure SonarQube servers in Jenkins, Create a Jenkins Pipeline, Write the Jenkinsfile in your repository to integrate SonarQube with Jenkins pipeline.
Related Articles:
Integrate GitHub with Jenkins Freestyle Job
Reference: