In this article, we are going to cover how to integrate a GitHub repository with a Jenkins Freestyle project job Integrate GitHub with Jenkins Freestyle Job.
Table of Contents
What is Jenkins FreeStyle Job?
A Jenkins Freestyle job (or project) is one of the most basic and straightforward job types in Jenkins, designed for simple automation tasks and builds.
It’s often referred to as a “Freestyle project” or “Freestyle job.” In a Freestyle job, you can configure build steps and post-build actions using a graphical user interface, making it suitable for users who may not have extensive scripting or programming skills.
What is a GitHub Repository?
A GitHub repository, often referred to as a “repo,” is a central location where you can store, manage, and collaborate on code and other project-related files using the Git version control system.
GitHub is a web-based platform that provides hosting for Git repositories, along with a range of collaboration and project management tools.
Integrate GitHub with Jenkins Freestyle Job
Integrating a GitHub repository with a Jenkins Freestyle project/job involves setting up a connection between Jenkins, a popular continuous integration and continuous deployment (CI/CD) tool, and a GitHub repository, which hosts your source code.
This integration allows Jenkins to automate build and deployment processes whenever changes are pushed to your GitHub repository.
Prerequisites:
- Ensure that you have Jenkins installed and configured correctly.
- Install the “GitHub plugin” in Jenkins if it’s not already installed. You can install it by going to “Manage Jenkins” -> “Manage Plugins” -> “Available” tab, and then search for “GitHub plugin” and install it.
How to integrate a GitHub repository with a Jenkins Freestyle project/job
To integrate a GitHub repository with a Jenkins Freestyle project/job, you can use the “GitHub plugin” for Jenkins. Here are the steps to set up this integration:
Step #1 Create a Freestyle Project in Jenkins
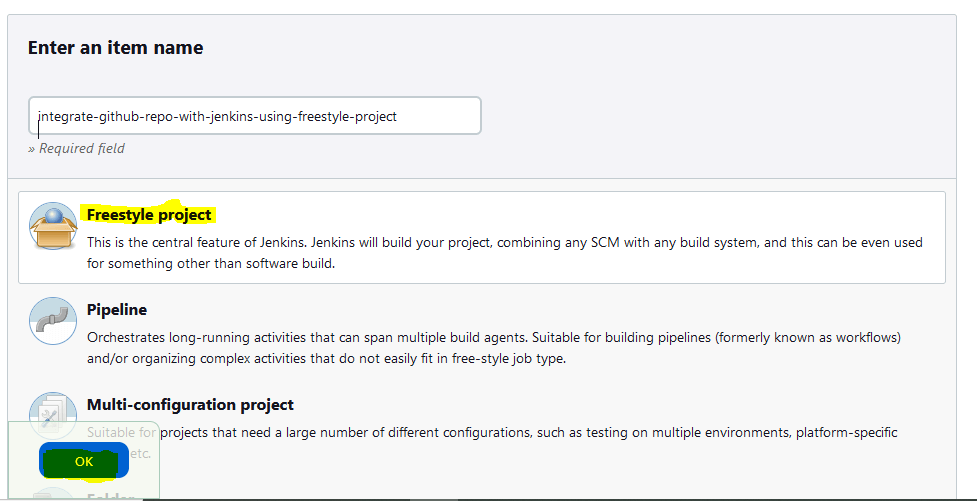
In Jenkins, click on “New Item” to create a new job. Choose “Freestyle project” as the project type and give it a name.

Step #2:Configure Source Code Management/GitHub Repo in Jenkins
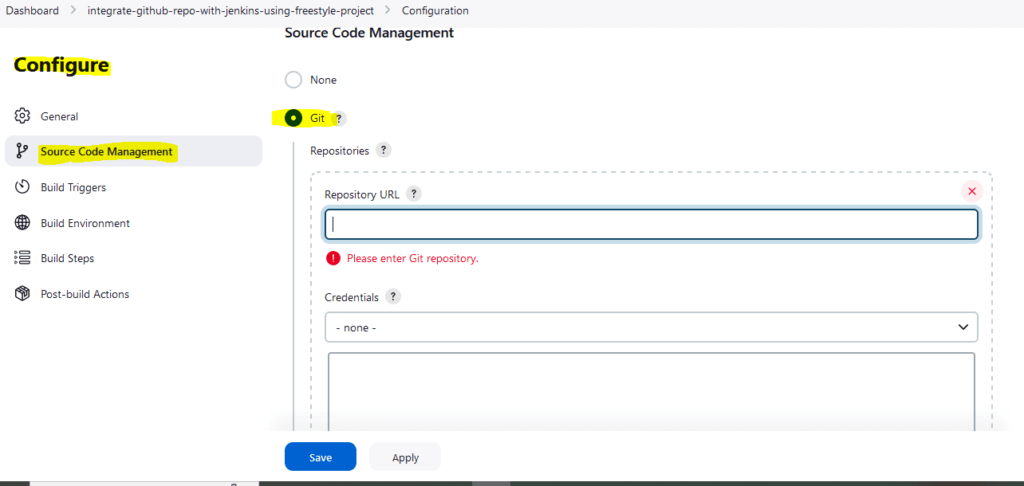
In the project configuration, scroll down to the “Source Code Management” section. Select “Git” as the source code management system.

In the “Repository URL” field, enter the URL of your GitHub repository (e.g., https://github.com/username/repo.git). If you’re using private repositories, you will need to set up SSH keys or provide credentials in the “Credentials” section.
Step #3:Build Maven Project in Jenkins Freestyle Job
Configure Build Steps: In the “Build” section, add build steps specific to your project. This could include compiling code, running tests, or deploying artifacts. As shown in the below picture.

Step #4:Save the Configuration: Click the “Save” button to save your job configuration
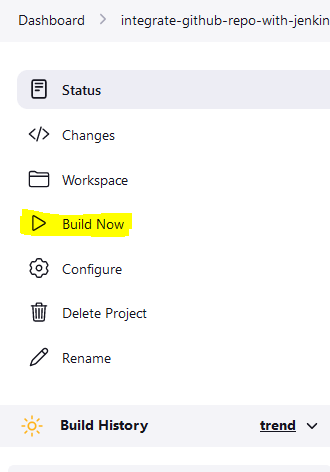
Step #5:Manually Build the Job: You can manually build the job by clicking the “Build Now” option on the job’s page

Step #6:View Jenkins Pipeline Execution
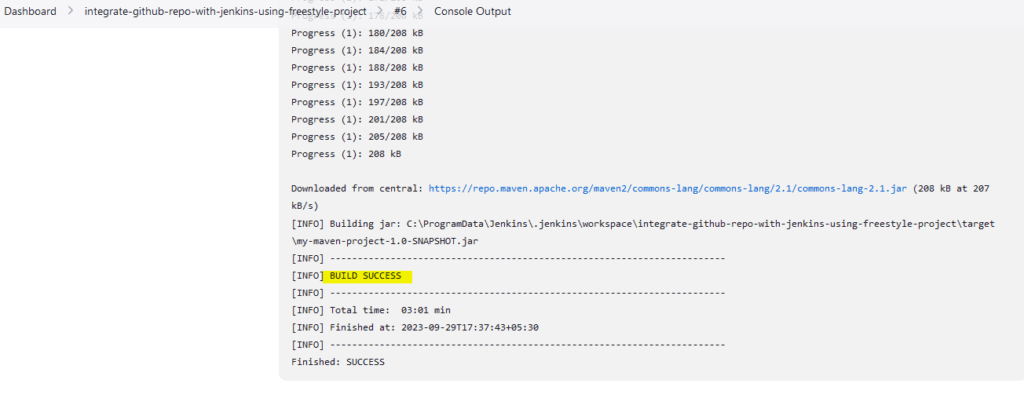
You can monitor the progress and view the logs of the pipeline execution on the job’s page. Click on the pipeline job, and then select “Console Output” to see the detailed output of each stage and step.

That’s it! Your Jenkins Freestyle job is now integrated with your GitHub repository. Jenkins will build your project whenever it detects changes in the repository based on the configuration you set up. You can also manually trigger builds as needed.
Conclusion:
In this article we have covered How to integrate a GitHub repository with a Jenkins Freestyle project/job | Integrate GitHub with Jenkins Freestyle Job
How to Install Jenkins on Ubuntu 22.04 LTS
Reference: