In this article, we will walk you through the process of adding a slideshow to your WordPress website using the Smart Slider 3 plugin.
Table of Contents
What is Smart Slider 3?
Smart Slider 3 is a powerful and user-friendly WordPress plugin that allows users to create responsive and customizable slideshows. It offers a drag-and-drop editor, pre-designed templates, and advanced animation effects to help you design stunning sliders without any coding knowledge.
Steps to Add a Slideshow Using Smart Slider 3 Plugin
Step #1:Install and Activate Smart Slider 3 in WordPress
1.Log in to Your WordPress Admin Panel:
Navigate to yourwebsite.com/wp-admin.
Enter your WordPress Admin login credentials.

After successfully logging in, you will be redirected to the WordPress Dashboard.

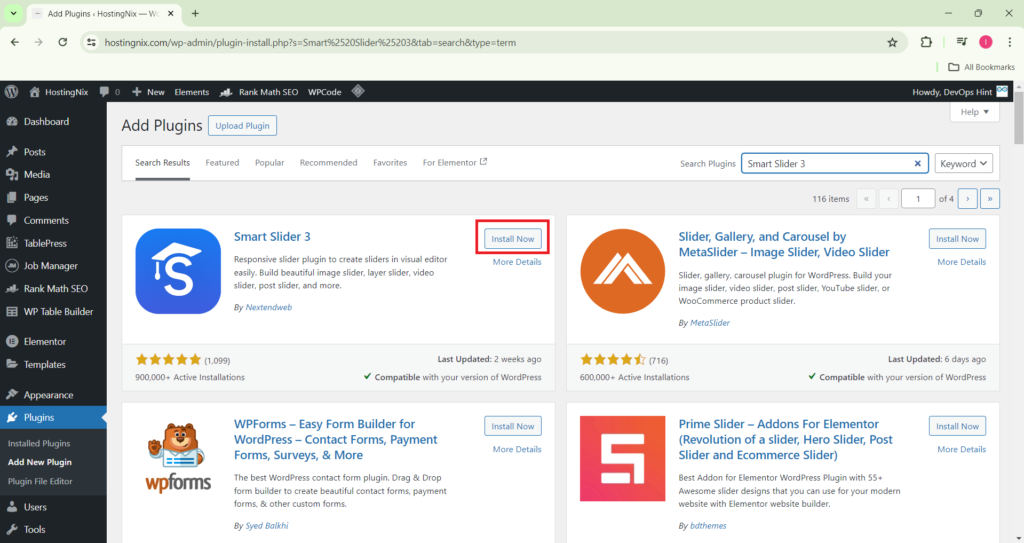
2.Go to the Plugins Section
In the left sidebar, click on Plugins > Add New Plugin.

3.Search for Smart Slider 3 in the search bar.
In the search bar, type Smart Slider 3

4.Install and Activate the Plugin:
Click the Install Now button.
Once installed, click Activate to enable the plugin on your site.

Once the plugin is activated, you will see a new menu called Smart Slider in your WordPress dashboard.

Step #2:Create a New Slider
Go to Smart Slider in the WordPress dashboard.
Click on the Smart Slider Dashboard.

You will see the Welcome Page of Smart Slider 3. Click “Go To Dashboard”

Click on New Project
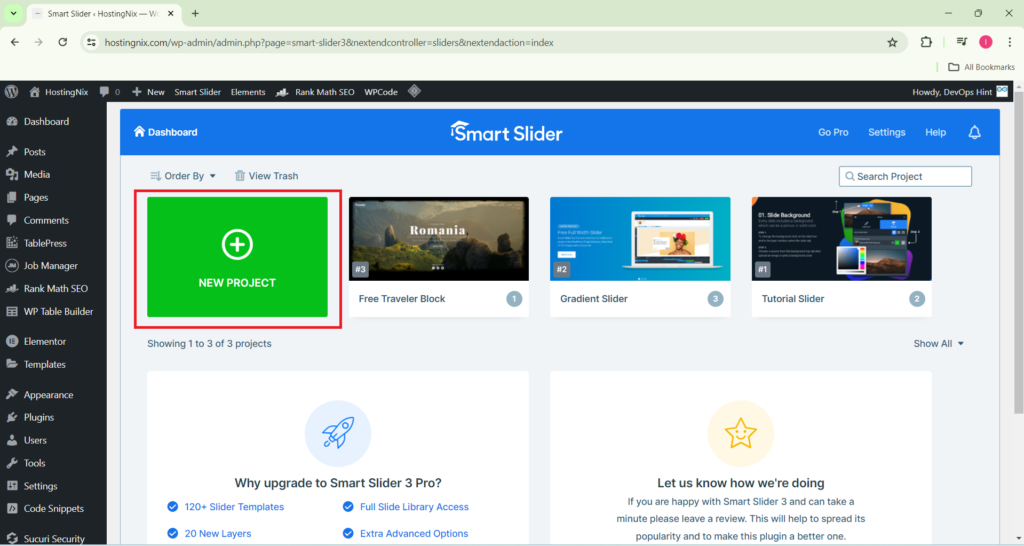
Choose one of the following options:
Create a New Project – Start from scratch and customize every aspect of your slider.
Start with a Template – Use a pre-designed layout and modify it as needed.

Option 1: Creating a New Slider from Scratch
In this step, after selecting “Create a New Project”, you need to configure the following settings:
Choose Project Type & Slider Type
- Project Type: Select Slider (default).
- Slider Type: Choose Simple (default) or upgrade to Pro for more options like Carousel or Showcase.

Name your slider and choose the desired layout (e.g., full-width, boxed, etc.).
Click Create to proceed.

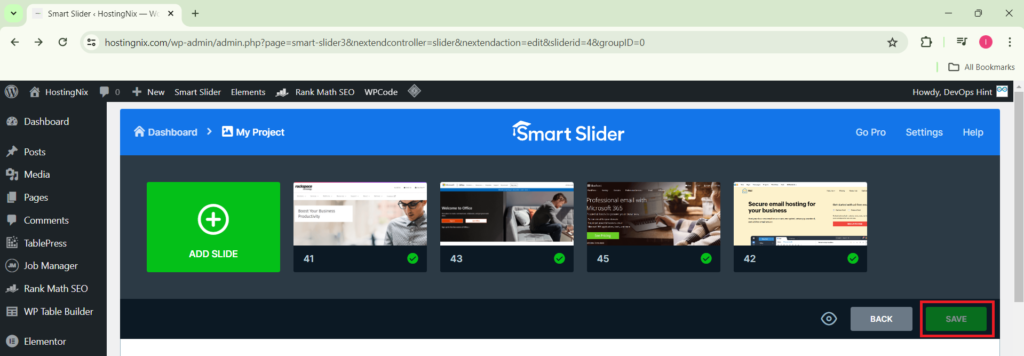
After clicking “CREATE”, you’ll be redirected to the Slide Editor. Now, follow these steps:
Click the “Add Slide” button.

Choose Slide Type, you have multiple options here:
- Image (Highlighted in green) – Upload images to create slides.
- Blank – Add text, buttons, or other elements manually.
- Post – Display WordPress posts dynamically (Pro feature).
- Static Overlay – Add static content over all slides.
- Dynamic Slides – Pull data dynamically (Pro feature).

Add an Image Slide
Click on the “Image” option (already highlighted in green).

Select an image from your Media Library or upload a new one.

Click “Select” to add it to your slider.

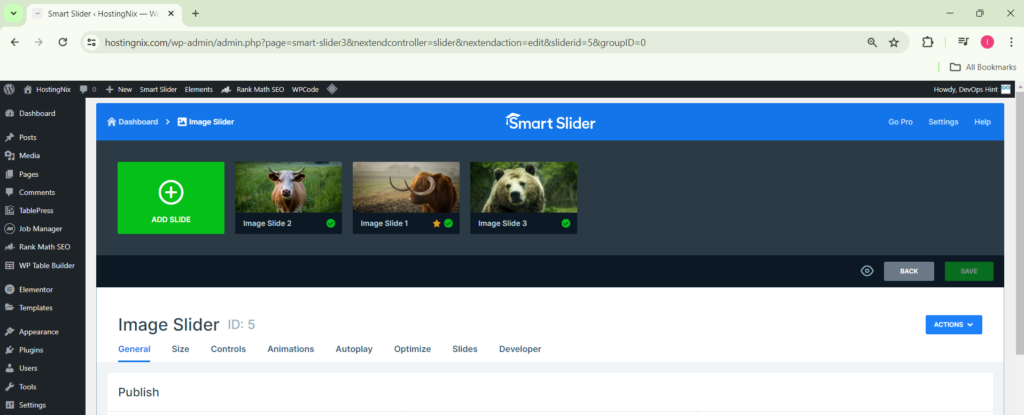
Add More Slides
Click “Slide One”, “Slide Two”, or “Drop Images Here” to upload more images.
Repeat the process for each slide.
Save Your Work
Click the green “SAVE” button in the bottom right corner.
Click the eye icon (Preview) to see how your slideshow looks.
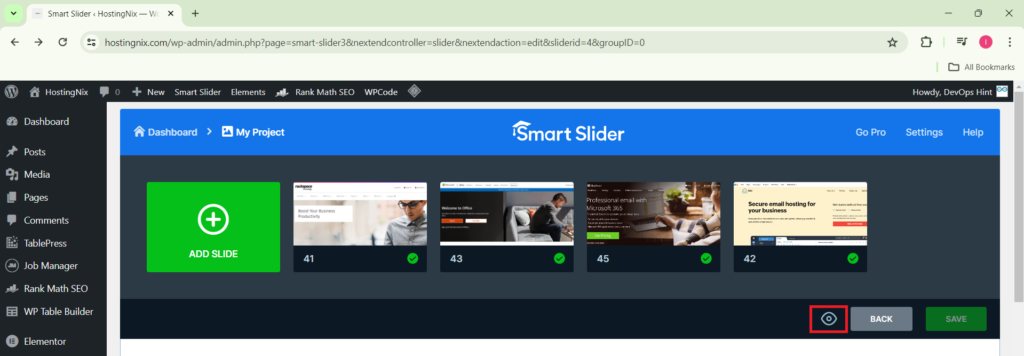
Now, you can preview your newly created slider.

Option 2: Using a Template
Select Start with a Template.

This will open the Template Library where you can choose from pre-designed sliders.

Browse through the available free and premium templates.

Use the left-side filters to choose between Slider, Block, Page, or Showcase.

Click “Import” to add the template to your slider list.

After importing, the template will be added to your slider list.
Click the eye icon (Preview) to see how your slideshow looks.

Now, you can see the Preview of your Template.

Step #3: Edit the Imported Template
Once you have previewed the template and confirmed it fits your needs, click Edit to start customizing.

Modify the text, images, and buttons by clicking on the respective elements.

Adjust the layout, animations, and colors to match your branding.

Step #4: Configure slider settings (Optional)
After editing the template, you can fine-tune your slider’s behavior by adjusting the slide settings.
Click on the slide you want to modify.
Configure Slider Controls
Navigate to the General settings.
Go to Controls to enable navigation arrows, bullets, or thumbnails.

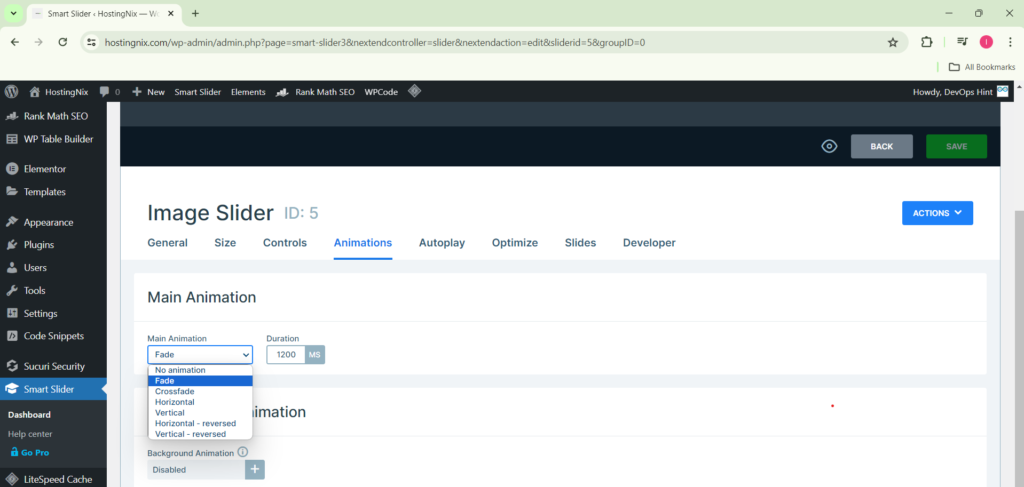
Customize the Animation settings to add transition effects between slides.
Save your settings once satisfied.
Step #5:Publish and Display the Slider
Copy the generated shortcode for your slider.

Go to the page or post where you want to display the slideshow.
Paste the shortcode into the content editor.
- Alternatively, you can use the Shortcode block in the WordPress Block Editor.

Click Publish/Update to apply changes.

The slider will now be live on your website.

Conclusion:
Adding a slideshow to your WordPress website using Smart Slider 3 is a simple yet effective way to enhance your site’s visual appeal. By following these steps, you can create stunning sliders and engage your visitors with dynamic content. Experiment with different layouts and animations to make your slideshows even more interactive.
Related Articles:
How to Create Table in WordPress Using WP Table Builder
Reference: