In this article we are going to cover How to Create and run your first GitLab CI CD pipeline, check available runner, create .gitlab-ci.yml file, check the status of your pipeline and jobs, edit yaml file and delete .gitlab-ci.yml file.
What is CI/CD pipeline ?
A CI/CD pipeline is a sequence of steps that smooth the software delivery process. Through a DevOps, CI/CD enhance application development using monitoring and automation. A CI/CD pipeline is particularly useful when it comes to integration and continuous testing, which are typically difficult to perform, time-consuming, and require the creation of stubs and drivers. Each an every step of a CI/CD pipeline is a subset of tasks grouped into pipeline stages.
Prerequisites:
- GitLab Account
How to Create and run your first GitLab CI CD pipeline
Step #1:To check available runner in GitLab CI/CD.
Optional step: Make sure that you have runners available to run your jobs/project. If you are work on GitLab.com then avoid this step because GitLab issues shared runners by default.
How to check available runner in GitLab ?
To check available runners:
Go to particular Project ->Settings -> CI/CD ->Runner and expand Runners.
Minimum one runner is active with a green color next to it, to process your jobs.
Step #2:To create .gitlab-ci.yml file in GitLab CI/CD.
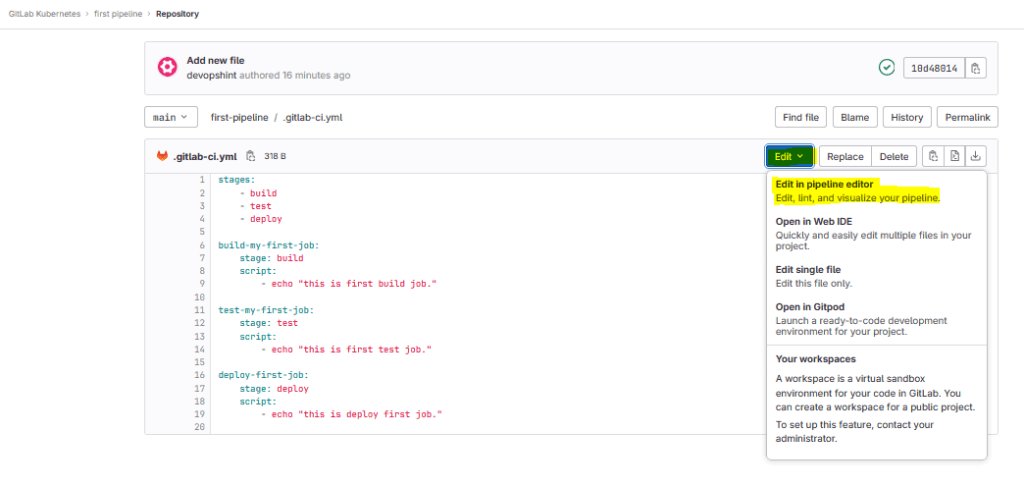
You have to create yaml file in your repository. A YAML file where you specify instructions for GitLab CI/CD.
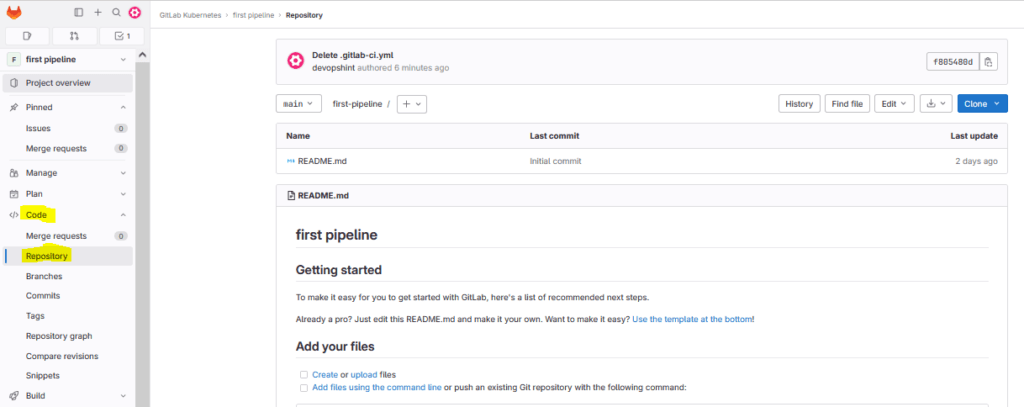
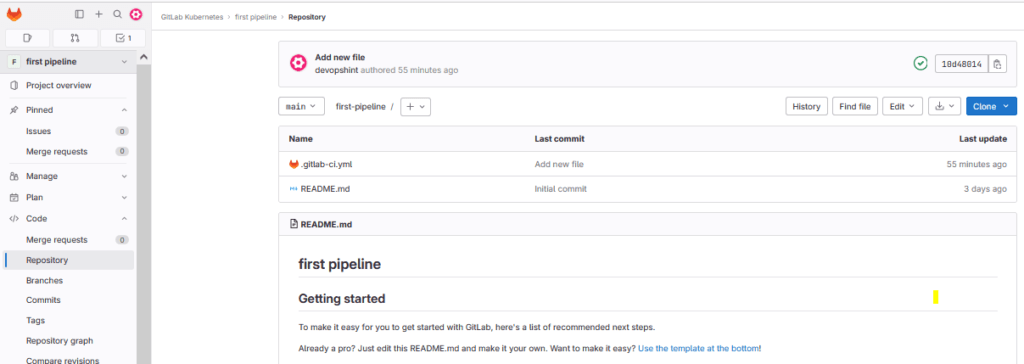
Now create a .gitlab-ci.yml file: Go to specific project -> in left side bar -> Code > Repository.
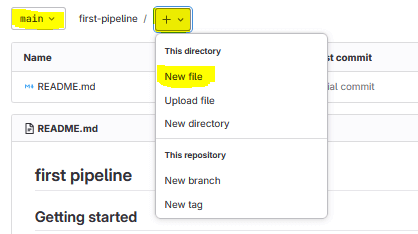
Select the branch which you want to commit to. Then select the plus icon and click on New file.
Enter the Filename .gitlab-ci.yml and write down code in the larger window.
stages:
    - build
    - test
    - deploy

build-my-first-job:
    stage: build
    script:
        - echo "this is first build job."

test-my-first-job:
    stage: test
    script:
        - echo "this is first test job."

deploy-first-job:
    stage: deploy
    script:
        - echo "this is deploy first job."
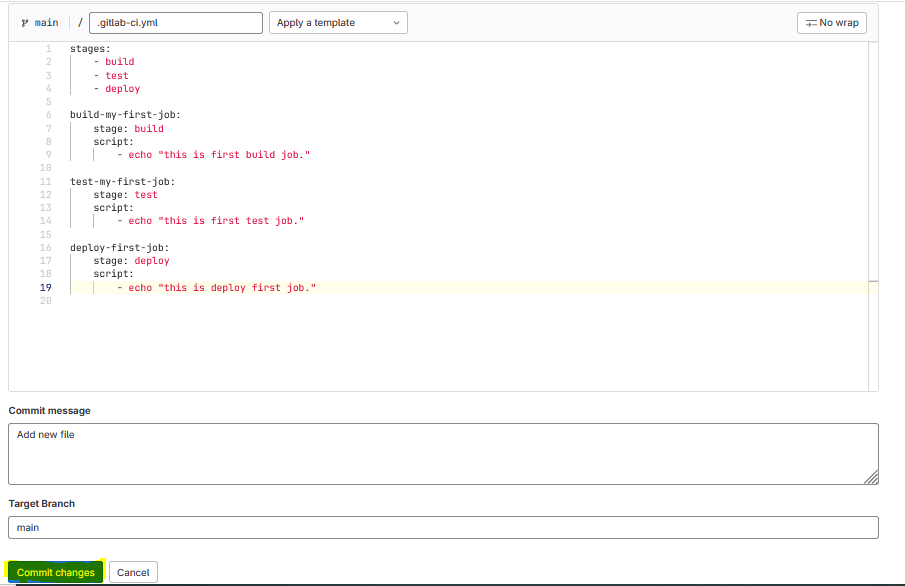
For ex: Above picture in that code shows four jobs: stages, build-my-first-job, test-my-first-job and deploy-first-job. The comments listed in the echo commands are displayed in the UI when you view the jobs.
Click on Commit changes.
After that you get “the file has been successfully created” message.
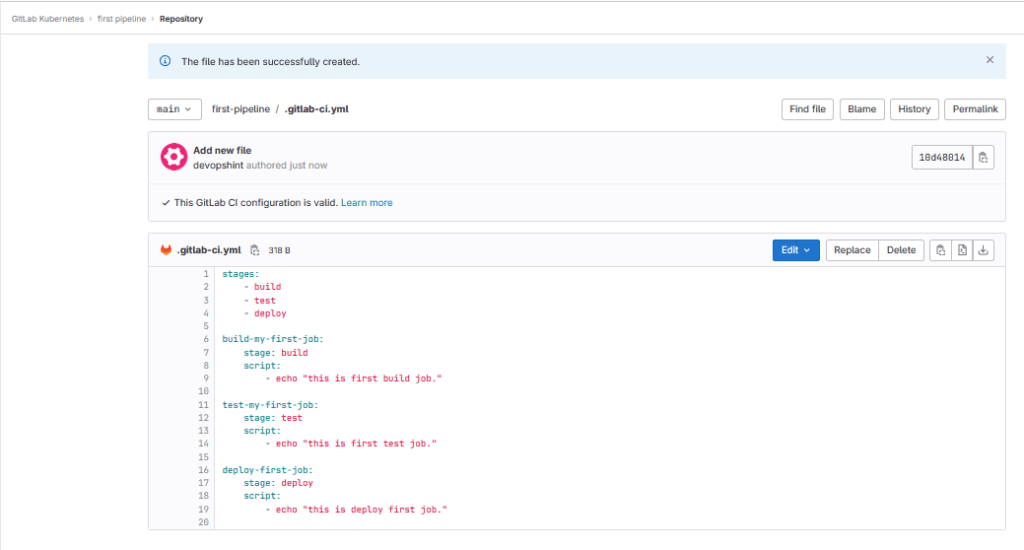
When you create and specify in the .gitlab-ci.yml file then the pipeline starts and runs the jobs.
Step #3:To check the status of your pipeline and jobs.
Go to Project -> build -> pipelines.
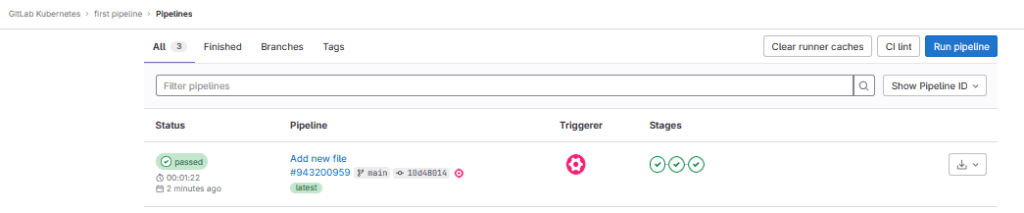
A pipeline with three stages should be displayed:
View a visual representation of your pipeline by selecting the pipeline ID.

View details of a job by selecting the job name. you can see deploy-first-job.

Important point: If you want to edit your .gitlab-ci.yml file then you can use pipeline editor.
How to delete .gitlab-ci.yml file?
Go to specific project -> repository -> Click on yaml file which you want to delete.
Click on delete.

After click on file delete, you will get ‘The file has been successfully deleted’ message.

In this article we have covered How to Create and run your first GitLab CI CD pipeline, check available runner, create .gitlab-ci.yml file, check the status of your pipeline and jobs, edit yaml file and delete .gitlab-ci.yml file.
Related Articles:
How to Create Group and Users in GitLab [2 Steps]
Reference:
Create and run your first GitLab CI/CD pipeline GitLab Official Page