In this article we will cover How to integrate SonarQube for Java Gradle Project in GitLab CI/CD.
What is SonarQube?
SonarQube is a widely used open-source platform for continuous inspection of code quality. It analyzes code for bugs, vulnerabilities, code smells, and other issues to ensure that your software adheres to coding standards and best practices. It provides detailed reports and metrics that help developers and teams improve code quality and maintainability.
When integrating SonarQube with a Gradle project in a GitLab CI/CD pipeline, you can automate code analysis as part of your development workflow
Prerequisites
- Ubuntu 22.04 LTS with minimal Installation
- SSH Access with sudo privileges
- SonarQube Server Details
Table of Contents
Step #1:How to Install OpenJDK and Gradle on Ubuntu 22.04 LTS
Update the system packages
sudo apt updateInstall OpenJDK on Ubuntu 22.04 LTS
sudo apt install openjdk-17-jdkTo check Java Version
java –versionTo Install Gradle
Download the gradle setup in /tmp directory using below command,
cd /tmpTo download specific version of gradle use below syntax
wget https://services.gradle.org/distributions/gradle-7.4.2-bin.zip
Using ls command you can check downloadled zip file

Install unzip on Ubuntu if not installed
sudo apt install unzipExtract Gradle Package:
sudo unzip -d /opt/gradle gradle-7.4.2-bin.zipSet Environment Variables:
sudo nano /etc/profile.d/gradle.shPaste the following configuration:
export GRADLE_HOME=/opt/gradle/latest

export PATH=$PATH:/opt/gradle/gradle-7.4.2/bin
Note: using “Ctrl+x y then enter” you can save your configuration
Load the environment variable using below command
source /etc/profile.d/gradle.shGive the excutable permission to above script
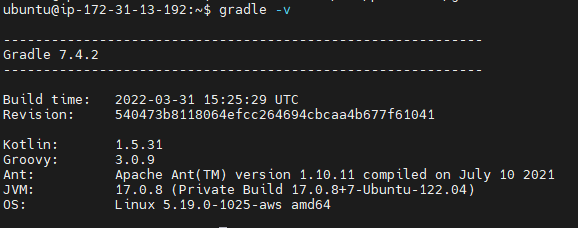
sudo chmod +x /etc/profile.d/gradle.shVerify Gradle version:
gradle -vOutput:
Step #2:How to Install GitLab Runner on Ubuntu 22.04 LTS
Add the Official GitLab Repository using below command, to check latest Gitlab Repository visit the official GitLab Runner page
curl -L "https://packages.gitlab.com/install/repositories/runner/gitlab-runner/script.deb.sh" | sudo bash
Install GitLab Runner on Ubuntu, Run below command to install latest GitLab Runner on Ubuntu 22.04 LTS
sudo apt-get install gitlab-runner
To check status if GitLab Runner service is running or not
sudo gitlab-runner status
Step #3:How to Register GitLab-Runner
To Register GitLab-Runner run the below command:
sudo gitlab-runner registerThen enter the URL
To registration token from gitlab account:-
- Go to the GitLab Account
- Click on Project
- Then click on setting and in below click on CI/CD
- Click on Runner Expand and copy registration token
- And paste on command
Then you can give any meaning full description
Then Enter tags for the runner (any tag)
Then choose any executor – shell , ssh , docker , etc.

Once you registered Runner for project then you will get runner as below,

Successfully, We have performed GitLab Runner Registration.
Error: This job is stuck because the project doesn’t have any runners online assigned to it. Go to Runners page.
Solution:
You have added tags while registering GitLab Runner however you have not added tags for your Job.
Follow below steps to add tags.
1. Navigate to Settings and click on CI/CD inside this click on Expand of Runners section
2. Go to Runners, click on edit and check on Indicates whether this runner can pick jobs without tags Box Click on run untagged jobs check box

Step #4:Add below code in build.gradle and setting.gradle
Add code in build.gradle
Add the sonarqube and java plugins in build.gradle
plugins {
        id 'java'
        id "org.sonarqube" version "4.3.0.3225"
}
Add the sonar properties in build.gradle
sonar {
  properties {
    property "sonar.projectKey", "sonaqube-gradle-gitlab"
    property "sonar.organization", "DevOpsHint"
    property "sonar.host.url", " SONAR_URL"
  }
}
Note: SONAR_URL is your “sonarqube server URL”.
Add code in setting.gradle
rootProject.name = 'sonarqube-java-gradle'
Step #5:How to Generate Token in sonarqube server
Go to your SonarQube server then go to administrator > my account

Go to security
Enter the name and type of token then click on generate, to generate tokens.


Copy the token in notepad for further use.
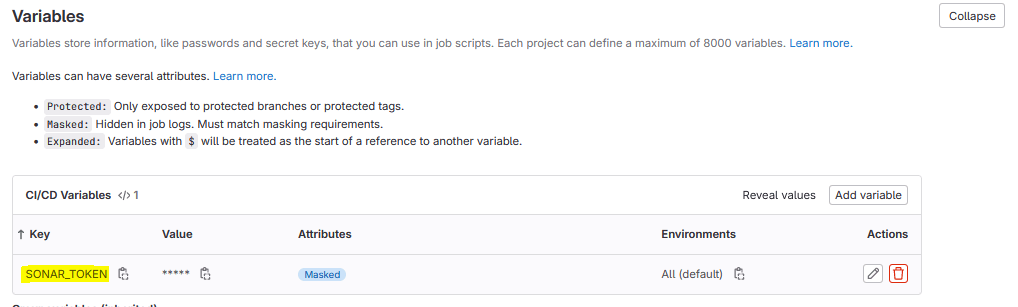
Step #6:How to Add variables in your repository
To add variable Go to setting section > CI/CD > Variables > click on add variable
SONAR_TOKEN: <Paste sonar token>
- Uncheck the “Protect Variable” checkbox
- Check the “Mask Variable” checkbox
- Uncheck the “Expand variable reference” checkbox
Then you get SONAR_TOKEN variables available in variables.
Step #7:SonarQube integration for Java gradle Project in gitlab CI/CD
Below gitlab-ci.yml file for SonarQube Integration for Java gradle Project.
stages:
  - build
  - test

build-java-project:
  stage: build
  script:
   - gradle build

image: gradle:jre11-slim
sonarqube-check:
  stage: test
  script: gradle sonar -Dsonar.token=SONAR_TOKEN
  only:
      - main
Monitor the Pipeline:
Go to your GitLab repository’s build section to monitor the progress of the pipeline.
Step #8:Check your sonarqube server
Check your SonarQube server to analyzes code for bugs, vulnerabilities, code smells, and other issues like below.

Conclusion:
In this article we have covered SonarQube Integration for Java Gradle Project in GitLab CI/CD.