Table of Contents
Step #1: Install Minikube on ubuntu 22.04 LTS
1. Update Ubuntu 22.04 Linux
It is not absolutely necessary to run the system update command before following the tutorial but recommended.
sudo apt update -yAfter updating, install a few other tools we will require
sudo apt install curl wget apt-transport-https -y
2. Install Docker and KVM
sudo apt install docker.ioGive permission to docker
sudo usermod -aG docker $USER
sudo chmod 666 /var/run/docker.sock
Check whether Virtualization support is enabled on your machine or not:
egrep -q 'vmx|svm' /proc/cpuinfo && echo yes || echo no
After that install the KVM and its other tools:
sudo apt install qemu-kvm libvirt-clients libvirt-daemon-system bridge-utils virtinst libvirt-daemon
Add your user to libvert group
sudo adduser -a $USER libvirt
sudo adduser -a $USER libvirt-qemu
Reload Group:
newgrp libvirt
newgrp libvirt-qemu
3. Download MiniKube binary
Next, we need to download the MiniKube binary available to download for Linux. We can get it using the command line tool cURL.
curl -LO https://storage.googleapis.com/minikube/releases/latest/minikube-linux-amd644. Install and Start MiniKube on Ubuntu 22.04
After having the binary of MiniKube on your Ubuntu 22.04 system, use the given command that will install it under your local folder, so that it can be accessible throughout the system using the terminal.
sudo install minikube-linux-amd64 /usr/local/bin/minikube
To check the version run:
minikube version
Output:
ubuntu@ip-172-31-32-58:~$ minikube version
minikube version: v1.32.0
commit: 8220a6eb95f0a4d75f7f2d7b14cef975f050512d
ubuntu@ip-172-31-32-58:~$
Step #2: Install Kubernetes CLI
To manage cluster resources, deploy applications, and inspect logs of Kubernetes clusters, we can use its command-line tool called kubectl. Here we will install that using the few commands given below.
curl -LO "https://dl.k8s.io/release/$(curl -L -s https://dl.k8s.io/release/stable.txt)/bin/linux/amd64/kubectl"
chmod +x ./kubectl
sudo mv kubectl /usr/local/bin/
To check the kubectl version, run:
kubectl version --client --output=yaml
Output:
clientVersion:
  buildDate: "2023-10-18T11:42:52Z"
  compiler: gc
  gitCommit: a8a1abc25cad87333840cd7d54be2efaf31a3177
  gitTreeState: clean
  gitVersion: v1.28.3
  goVersion: go1.20.10
  major: "1"
  minor: "28"
  platform: linux/amd64
kustomizeVersion: v5.0.4-0.20230601165947-6ce0bf390ce3
Step #3: Start MiniKube with KVM Driver on Ubuntu 22.04
We can use multiple drivers to deploy Minikube, however, for good performance here we are going for the docker, you can go for KVM, if you want, you just need to replace the docker in the given command with KVM2.
minikube start --vm-driver docker
Output:
clientVersion:
  buildDate: "2023-10-18T11:42:52Z"
  compiler: gc
  gitCommit: a8a1abc25cad87333840cd7d54be2efaf31a3177
  gitTreeState: clean
  gitVersion: v1.28.3
  goVersion: go1.20.10
  major: "1"
  minor: "28"
  platform: linux/amd64
kustomizeVersion: v5.0.4-0.20230601165947-6ce0bf390ce3

ubuntu@ip-172-31-32-58:~$ minikube start --vm-driver docker
* minikube v1.32.0 on Ubuntu 22.04 (xen/amd64)
* Using the docker driver based on existing profile
* Starting control plane node minikube in cluster minikube
* Pulling base image ...
* Updating the running docker "minikube" container ...

X Docker is nearly out of disk space, which may cause deployments to fail! (97% of capacity). You can pass '--force' to skip this check.
* Suggestion:

    Try one or more of the following to free up space on the device:

    1. Run "docker system prune" to remove unused Docker data (optionally with "-a")
    2. Increase the storage allocated to Docker for Desktop by clicking on:
    Docker icon > Preferences > Resources > Disk Image Size
    3. Run "minikube ssh -- docker system prune" if using the Docker container runtime
* Related issue: https://github.com/kubernetes/minikube/issues/9024

* Preparing Kubernetes v1.28.3 on Docker 24.0.7 ...
* Verifying Kubernetes components...
  - Using image gcr.io/k8s-minikube/storage-provisioner:v5
* Enabled addons: storage-provisioner, default-storageclass
* Done! kubectl is now configured to use "minikube" cluster and "default" namespace by default
For status :
minikube status
Output:
minikube
type: Control Plane
host: Running
kubelet: Running
apiserver: Running
kubeconfig: Configured
Step #4: Installing ArgoCD on Minikube
We will start with launching minikube. There are several driver options that you can use to start a minikube cluster (virtualbox, docker, hyperv). I used docker as driver.
minikube start --driver=docker
1. Just like other Kubernetes tools, ArgoCD requires a namespace with its name. Therefore, we will create a namespace for argocd.
kubectl create ns argocd2. We will apply ArgoCD manifest installation file from ArgoCD github repository
kubectl apply -n argocd -f https://raw.githubusercontent.com/argoproj/argo-cd/v2.5.8/manifests/install.yaml
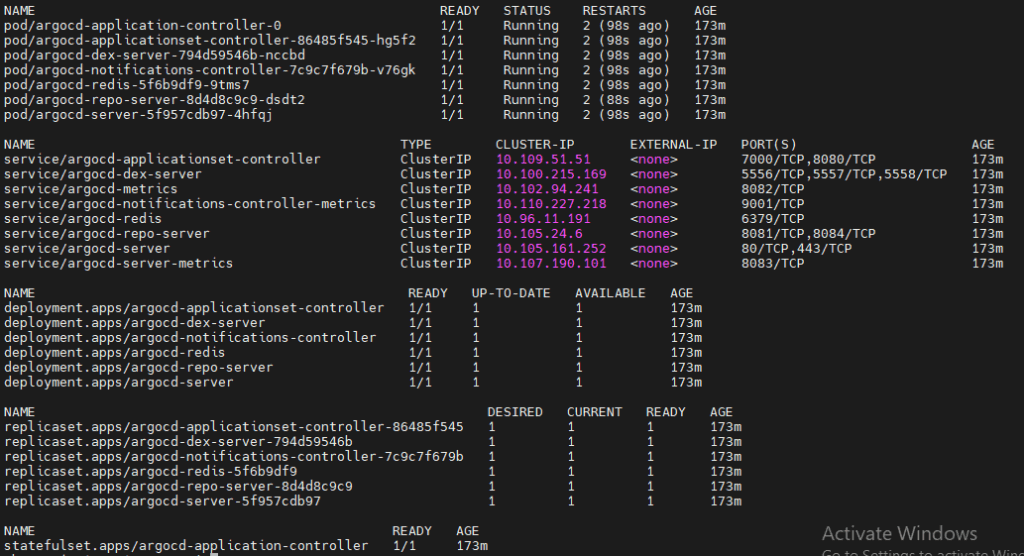
3. Let’s verify the installation by getting all the objects in the ArgoCD namespace.
kubectl get all -n argocd
Output:
Step #5: Lets access Argo CD in Browser
ArgoCD has a nice user interface for management. It has a dashboard that provides a visual representation of the current state of your applications, their health, and the resources they are deployed on. The user interface is designed to be intuitive and user-friendly, allowing you to manage your applications and monitor their progress with ease.
kubectl port-forward svc/argocd-server -n argocd --address 0.0.0.0 8080:443

Now we can go to a browser and open instance_ip:8080

You will see a privacy warning. Just ignore the warning, click on Advanced and then hit on Proceed to localhost (unsafe) to continue to the GUI interface. (Your browser setting may present a different option to continue).
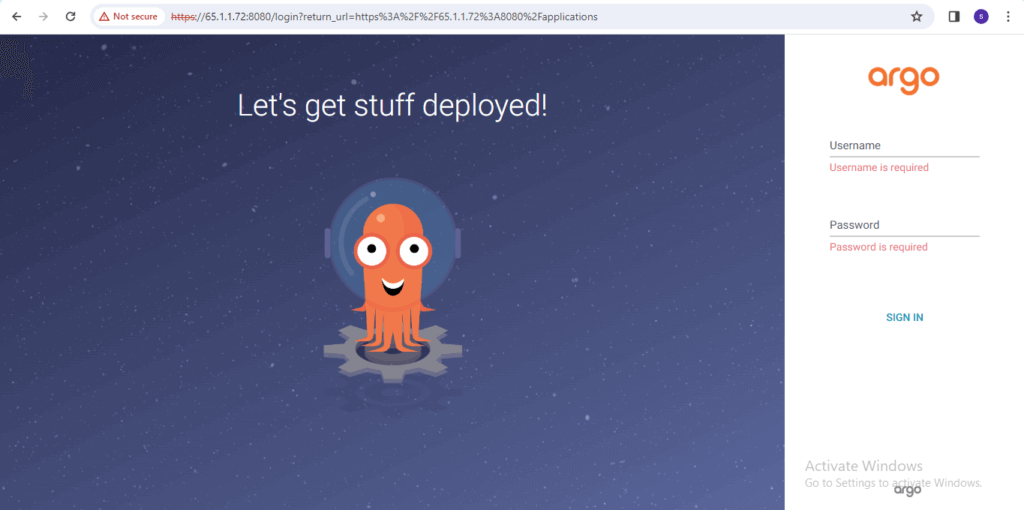
To use ArgoCD interface, we need to enter our credentials. The default username is admin so we can enter it immediately, but we will need to get the initial password from ArgoCD through minikube terminal.
Initial password is kept as a secret in the argocd namespace; therefore, we will use jsonpath query to retrieve the secret from the argocd namespace. just open a new terminal and enter the following code to do the trick for you.
kubectl -n argocd get secret argocd-initial-admin-secret -o jsonpath="{.data.password}" | base64 -d; echo
Copy the password, go back to your browser and enter it as password (username is admin). You should be in the GUI interface.
Step #6: Deploying a test app
Now that we are in the user interface, we can create a new app. The source code for my application is in my Github repo, so I will connect my Github repo to ArgoCD.
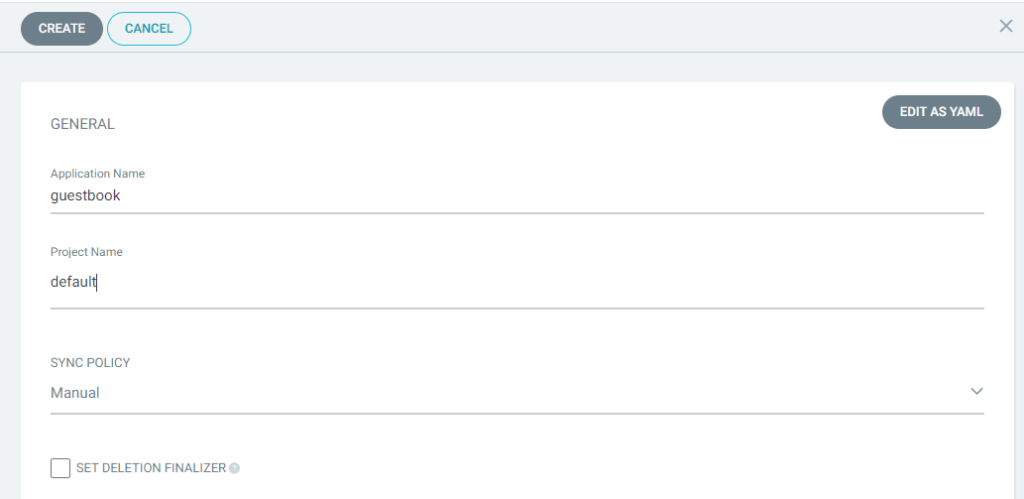
After logging in, click the + New App button as shown below:

Give your app the name guestbook, use the project default, and leave the sync policy as Manual:
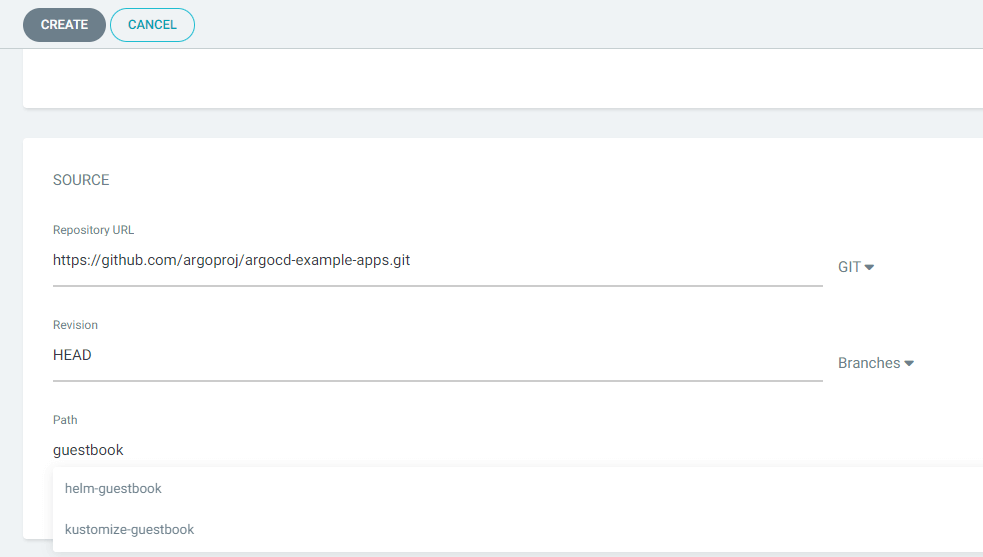
Connect the https://github.com/argoproj/argocd-example-apps.git repo to Argo CD by setting repository url to the github repo url, leave revision as HEAD, and set the path to guestbook:
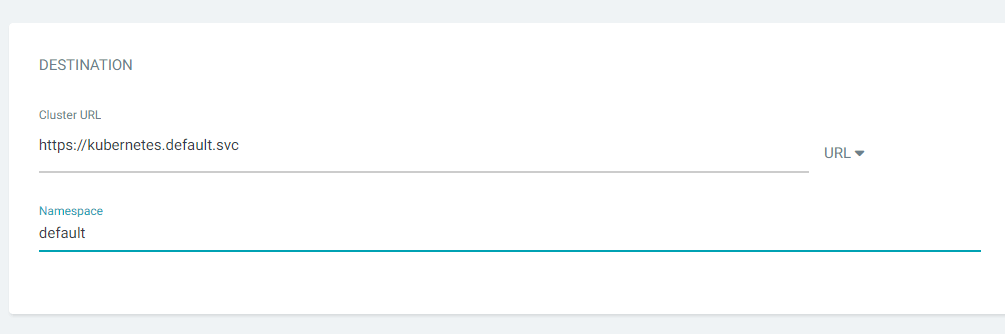
For Destination, set cluster URL to https://kubernetes.default.svc (or in-cluster for cluster name) and namespace to default:
Click on Create after that you can see
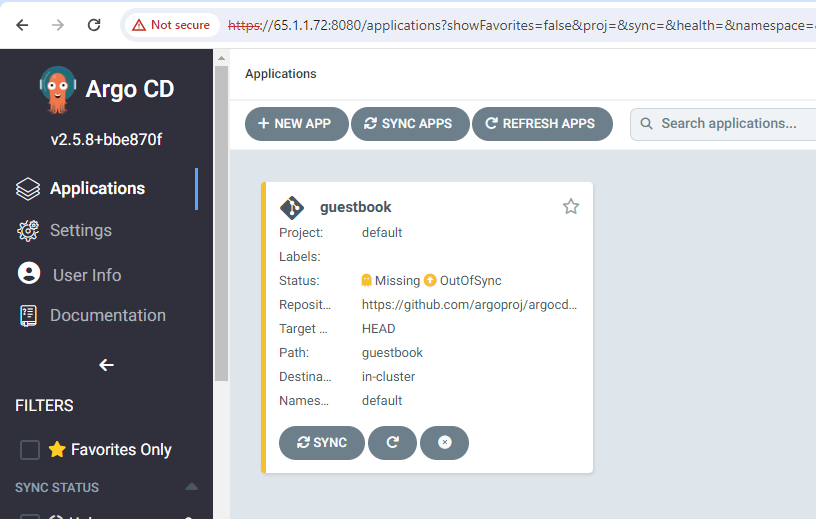
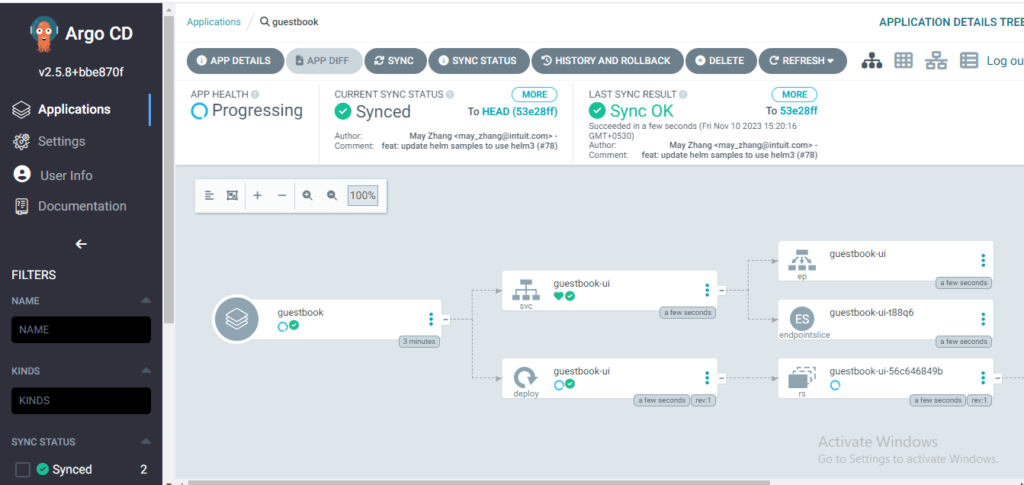
click on guestbook then you will see the result
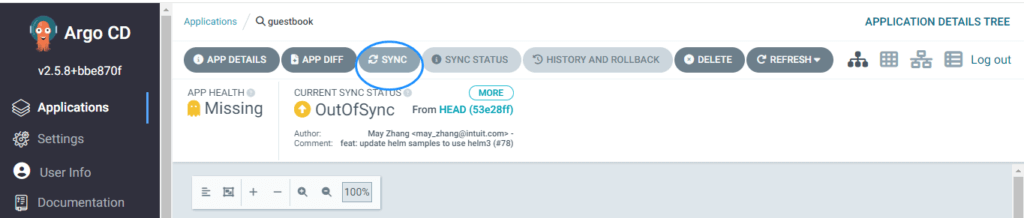
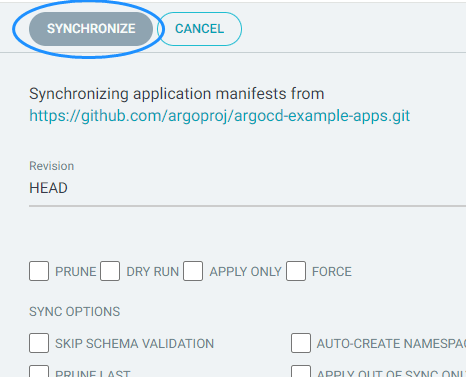
Click on Synk
Conclusion:
We have successfully set up ArgoCD on Ubuntu 22.04 LTS using Minikube. With ArgoCD running, we can now efficiently manage Kubernetes applications using GitOps, ensuring automated deployments and synchronization with our Git repository. The ArgoCD UI is accessible, and we have deployed a test application successfully. This setup streamlines Kubernetes management, making deployments more reliable and automated.