In this article we are going to cover How to Install GitLab Runner on Amazon Linux 2 and Register GitLab Runner to GitLab on Amazon Linux 2 .
Table of Contents
Step #1: Add the Official GitLab Repository
First add the official GitLab Repository using below command, to check latest Gitlab Repository visit the official GitLab Runner page
curl -L "https://packages.gitlab.com/install/repositories/runner/gitlab-runner/script.rpm.sh" | sudo bashStep #2: Install GitLab Runner on Amazon Linux 2
Run below command to install latest GitLab Runner on Amazon Linux 2
sudo yum install gitlab-runneruse below commands to install specific version of GitLab Runner on Amazon Linux 2
yum list gitlab-runner --showduplicates | sort -rsudo yum install gitlab-runner-10.0.0-1Command to check GitLab Runner version
sudo gitlab-runner -version
Output:
Version:      13.4.1
Git revision: e95f89a0
Git branch:   13-4-stable
GO version:   go1.13.8
Built:        2020-09-25T20:03:43+0000
OS/Arch:      linux/amd64
To check status if GitLab Runner service is running or not
sudo gitlab-runner status
Output:
Runtime platform                                    arch=amd64 os=linux pid=29368 revision=e95f89a0 version=13.4.1
gitlab-runner: Service is running!
Commands to Start, Stop and Restart GitLab Runner
sudo gitlab-runner start
sudo gitlab-runner stop
sudo gitlab-runner restart
We have covered How to Install GitLab Runner on Amazon Linux 2.
Step #3: Grant sudo Permission to GitLab Runner User
After install GitLab Runner you will see gitlab-runner user in /home directory
cd /home
ls
Output:
gitlab-runner
To grant sudo permission to gitlab-runner user, ope the visudo file
sudo visudo
Add the gitlab-runner user in sudoers group and set NOPASSWD as shown below
gitlab-runner ALL=(ALL:ALL) ALL
gitlab-runner ALL=(ALL) NOPASSWD: ALL
Output:
# Host alias specification

# User alias specification

# Cmnd alias specification

# User privilege specification
root    ALL=(ALL:ALL) ALL
gitlab-runner ALL=(ALL:ALL) ALL

# Members of the admin group may gain root privileges
%admin ALL=(ALL) ALL

# Allow members of group sudo to execute any command
%sudo   ALL=(ALL:ALL) ALL

# See sudoers(5) for more information on "#include" directives:

#includedir /etc/sudoers.d
gitlab-runner ALL=(ALL) NOPASSWD: ALL
Step #4: Register GitLab Runner to GitLab on Amazon Linux 2
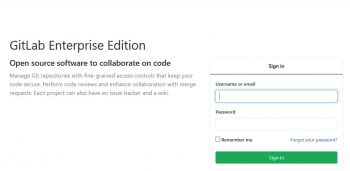
1. First login to GitLab Server with Username and Password.
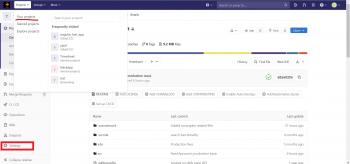
2. Click on your project and select Settings
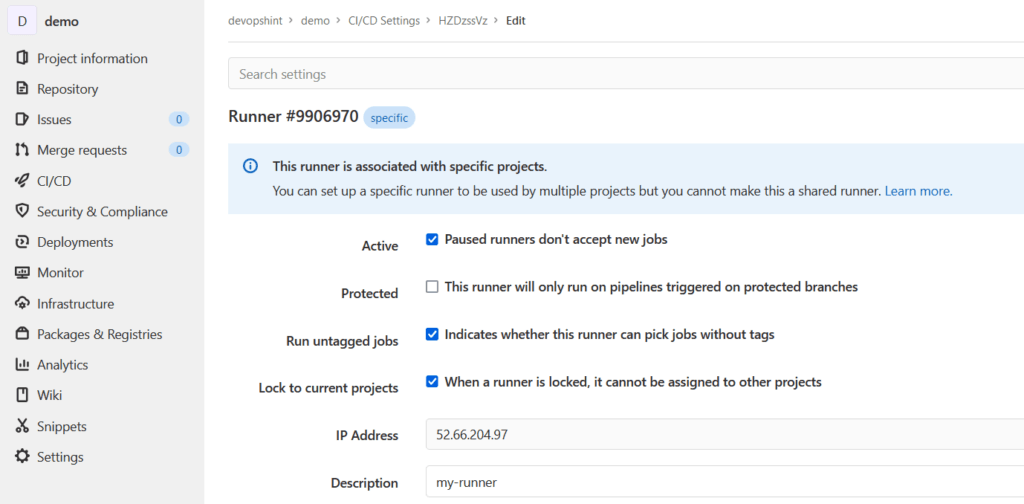
3. Navigate to Settings and click on CI/CD inside this click on Expand of Runners section
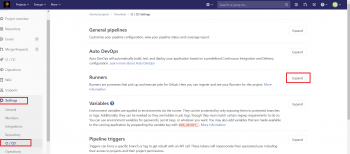
4. Copy GitLab server URL and Registration Token as shown below.
5. Paste GitLab Server URL and Token in registration command as below
sudo gitlab-runner register --name project-name-runner --url https://gitlab.fosstechnix.com --registration-token Uc7yzxTMzsXhXJx3zgM
OR
sudo gitlab-runner register
OR
if you want to register gitlab-runner with docker executor then use below command
sudo gitlab-runner register \
  --non-interactive \
  --url "GITLAB_SERVER_URL" \
  --registration-token "REGISTRATION_TOKEN" \
  --description "docker-runner" \
  --executor "docker" \
  --docker-image centos:latest
6. Copy above command. Login to GitLab runner server through SSH and paste & run copied command on command line.
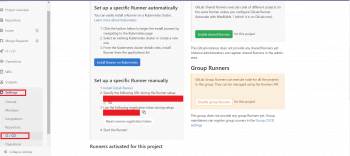
Follow the default options until which agent you need to register and then select agent as shown below
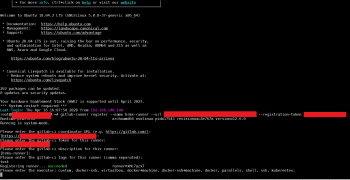
7. Once you registered Runner for project then you will get runner as below,
Successfully, We have performed GitLab Runner Registration.
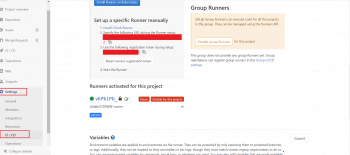
Error: This job is stuck because the project doesn’t have any runners online assigned to it. Go to Runners page.
Solution:
You have added tags while registering GitLab Runner however you have not added tags for your Job.
Follow below steps to add tags.
1. Navigate to Settings and click on CI/CD inside this click on Expand of Runners section
2. Go to Runners and check on Indicates whether this runner can pick jobs without tags Box
Uninstall GitLab Runner from Amazon Linux 2
First remove the gitlab-runner using apt
sudo yum install gitlab-runner-10.0.0-1Remove gitlab-runner gitlab directory
sudo rm -rf /var/opt/gitlabKill all processes of gitlab
pkill -f gitlabRemove gitlab-runner installation directories
sudo rm -rf /opt/gitlab
sudo rm -rf /etc/gitlab
sudo rm -rf /var/opt/gitlab
Conclusion
In this article, How to Install GitLab Runner on Amazon Linux 2 and Register GitLab Runner to GitLab on Amazon Linux 2.
Related Articles
How to Install GitLab on Ubuntu 18.04/16.04 LTS
Angular CI CD Pipeline with GitLab in 6 Easy Steps
Reference