In this article we are going to cover Integrate SonarScanner for Maven Project for analyzing a Java project in SonarQube?.
What is SonarScanner for Maven? and How To use SonarScanner with Maven for analyzing a Java project in SonarQube?
Table of Contents
What is SonarScanner for Maven?
SonarScanner for Maven is a plugin provided by SonarSource, designed to seamlessly integrate Maven-based projects with SonarQube, a platform for continuous inspection of code quality to perform static code analysis. It simplifies the process of analyzing code quality, identifying issues, bugs, vulnerabilities, and code smells in a Maven project by integrating it directly into the Maven build lifecycle.
Prerequisites:
- Ensure you have Java installed on your machine.
- Ensure you have SonarQube installed and running.
- Make sure Maven is installed and configured on your machine.
How To use SonarScanner with Maven for analyzing a Java project in SonarQube?
To use SonarScanner with Maven for analyzing a Java project in SonarQube, follow these steps:
Step #1:Configure SonarQube Server
- Open the sonar.properties file in the SonarQube installation directory and ensure that the SonarQube server is running. If not, start the server.
Step #2:Add SonarQube Configuration to setting.xml
- Open your
settings.xmlfile located in<MAVEN_HOME>/confusing a text editor. - Add the following configuration to set the plugin prefix:
<pluginGroups>
        <pluginGroup>org.sonarsource.scanner.maven</pluginGroup>
</pluginGroups>
- Add the SonarQube server details and project-specific configurations in the <properties> section of your setting.xml.
 <profile>
            <id>sonar</id>
            <activation>
                <activeByDefault>true</activeByDefault>
            </activation>
            <properties>
                <!-- Optional URL to server. Default value is http://localhost:9000 -->
                <sonar.host.url>
                  http://localhost:9000
                </sonar.host.url>
                 <!-- SonarQube authentication credentials -->
                <sonar.login>{your-sonarqube-token-or-username}</sonar.login>
                <sonar.password>{your-sonarqube-password}</sonar.password>
            </properties>
  </profile>
Replace {your-sonarqube-token-or-username} and {your-sonarqube-password} with your SonarQube authentication credentials. Using a token is recommended for security reasons.

Step #3:Run SonarQube Analysis for Maven Project
- Open Command Prompt or terminal.
- Navigate to the root directory of your Maven project (where pom.xml is located).
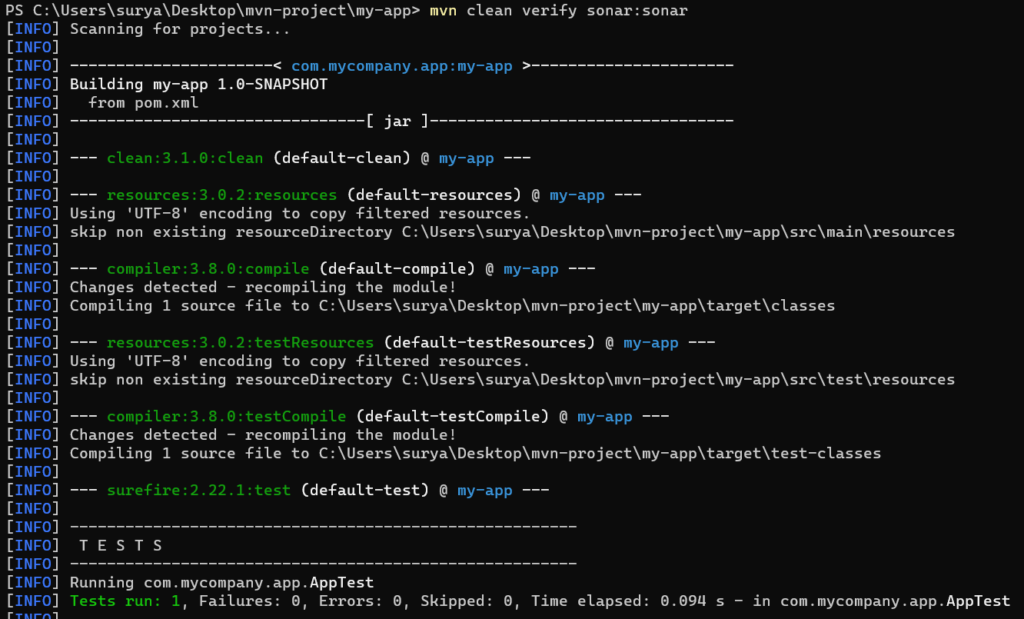
- Run the following command to trigger the SonarQube analysis:
mvn clean verify sonar:sonarThis command will clean the project, execute the tests, and trigger the SonarQube analysis.
Output:

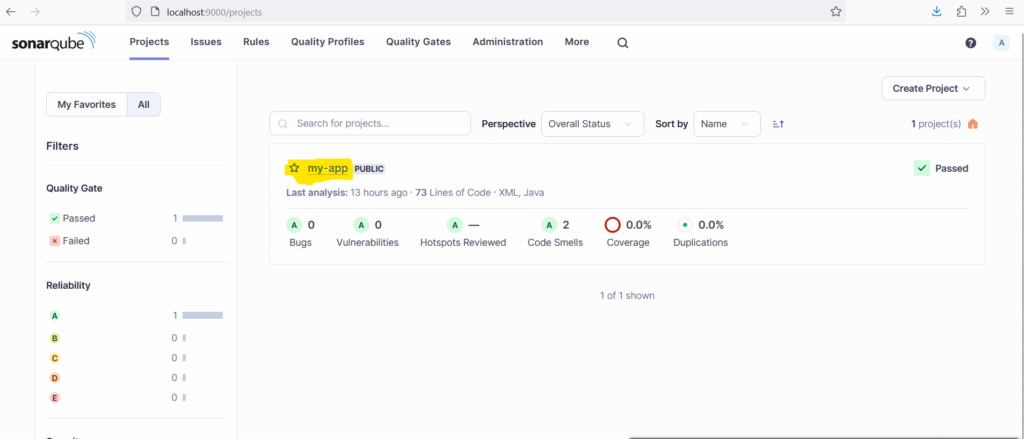
Step #4:View SonarQube Analysis Results for Maven Project
- Once the analysis is completed, go to the SonarQube web interface (http://localhost:9000) and navigate to your project listed there, allowing you to explore various metrics, issues, and reports generated by the analysis.
Ensure the specified versions of the SonarQube Maven plugin and other dependencies are compatible with your project and SonarQube server version. Always verify compatibility between different versions to avoid compatibility issues during the analysis process.
In this article we have covered What is SonarScanner for Maven? and How To use SonarScanner with Maven for analyzing a Java project in SonarQube?
Related Articles:
How to Create Account in SonarCloud?
Reference: